Tag Archives: tomatoes

Tomato Photo Shoot: Going Behind the Scenes

wp-1450066843952.jpg !

Tomato time continues!

Yes, that’s right.

One good tomato post deserves another 🙂

At first when creating Today we answer the question: Tomatoes: Salad PARTer or Conversation stARTer?, which later also took the twitter title, Tomato story-time with @SnoopDogg and other featured word players, I was thinking I would provide some tomato context as part of it: Garden tomatoes picked before the last frost. Left to sit on the table as they ripened. Two months pass. Two thirds remain. Wrinkled prunes on fire. Ready. Waiting. To tell their story. One word, next word, next word, Go!

The story and art were good on their own though, so to this next post the artist’s statement did go. Plus, there’s a selection of tomato photo shoot outtakes. Yes, here we are now, behind the scenes.

Some of you may remember how my table looked two months ago after the final garden harvest.

wpid-wp-1445571535605.jpg

Then from October to December, we went from green to red, and six plates to four.

wp-1450136003305.jpg

The amazing thing is how all the tomatoes turned red! I did have to toss a few along the way, but that was to be expected, and beside the point. Per past farmer advice and personal experience, a tomato, picked green, does not ripen. “As long as it has a little color, even the tiniest bit, it’ll turn red, but if it’s all green, it’ll stay green.” Apparently my table, the air in my kitchen, the soil in my garden, and/or the tomatoes’ latent lycopene desire to talk and tell stories won out. Some type of tomato magic you might say. Some internet research now also tells me that green tomatoes, particularly those of a more mature size, do have the potential to ripen. But nonetheless, little green grape and paste tomatoes, turning red!

Perhaps they were waiting for the big stage.

wp-1450316620915.jpg

Or hoping to impress some raisins.

img_20151216_191539.jpg

Or looking to take a ridic rhyme time pic.

wp-1450320806727.jpg

Wassup Catsup.

In any case, the tomato party continues. Initially I had been thinking that once the story was over, I’d come up with a good tomato recipe and use the tomatoes in it. Now I think they’ll keep me company for a while longer.

wp-1450325957052.jpg

What happens when you use every single remaining tomato.

Hey, how’s it going? Good to see you.

Invitation to Tomato Risotto

You’re invited!

I hope you come, because it’s going to be worth it.

wpid-wp-1444003701811.jpg

Tomato risotto.

Crunchy. Soft. Sweet. Sour. Sweet. Intriguing. More please.

These are some of the initial adjectives and commands that come to mind whenever I make this. After you try it, you might find yourself adding some more. The last two times I made it, for the family picnic last summer and a Princeton tailgate last month, I was party to almost the exact same, honest-speaking exchange:

My cousin (last year) / A new friend (this year): “Wow, this is really good.”
Me: “I know, right!?”

Lucky for me was the day sometime during the summer of 2009 when I happened to borrow Invitation to Mediterranean Cooking by Claudia Roden from the public library. I tried a few recipes from it at the time, and they were all good, but the one that stood out was Tomato Risotto. I’ve taken the book out several times since – let’s just say that mark on page 87, opposite the tomato risotto picture, may or may not have been caused be me (a food bookmark is what you want to see in a cookbook anyway, right??) – and I was looking forward to seeing the familiar pages again after I’d decided to make the recipe again last month. When I went to get the book from the library, though, someone else had taken it out! I also couldn’t find the photocopy I’d made of the recipe, which I wanted to see to double check the amounts. So, to the computer I went, and a small donation to the internet commerce fund later, I became the owner of my very own kitchen copy.

wpid-wp-1445308206918.jpg

Simple, good design outside, and like recipes inside

Here’s how to get the party going.

Tomato Risotto

Ingredients

  • 3 Tbsp olive oil
  • 2 onions, diced
  • 3 cloves garlic, diced
  • 2 1/2 cups Arborio rice
  • 12 fresh ripe local tomatoes, diced (about 6 cups, including the liquid)
  • 1 1/2 cups white wine
  • 2 1/2 tsp salt
  • 1/4 tsp pepper
  • 2 1/2 tsp sugar

Steps

  1. Heat the oil in a large frying pan, medium heat.
  2. Add the onion and garlic, and saute until partially softened, about 10 minutes.
  3. Add the rice.
  4. Add the tomatoes.
  5. Add the wine.
  6. Simmer for about 40 minutes, or until the rice is mostly cooked (just a little crunchy), stirring occasionally.
  7. Add the salt, pepper, and sugar.

I love writing three-word steps.

The next step is to try not to eat too much of it before going to your picnic, potluck, or tailgate. I like it best either warm or at room temperature. If you think the recipe looks really easy – and it is – allow me to note the following also: the original recipe doesn’t include onions (I added them), and I doubled the recipe (why make less when you can make more). A few other small variations from the C.Roden original are the salt, pepper, and sugar quantities. I listed what I used this time, but as I’ve noted in the past, such as when making lyrical tomato sauce, how much to add is up to you.

wpid-wp-1444003570427.jpg

wpid-img_20150926_134105.jpg

Two before shots

Yes, that’s how my table looked right before picking the 12 ripest tomatoes for the risotto.

These days, as in today, it’s looking more varicolored:

wpid-wp-1445571535605.jpg

wpid-wp-1445571837507.jpg

Red and green and shades between,
The fruit picked and the plants stripped,
Some ready and some waiting,
A table of the frost’s creation.

Yes, last weekend New Jersey had its first frost, which means a few things: I picked all the tomatoes from my community garden plot ahead of time (red and green), and farmers around the state, and in other states, picked their last tomatoes for the season too.

There were still some tomatoes at the farmers’ market when I went this week, though, and when I asked a farmer friend about it, he said you should be able to still get tomatoes at the market for a week or two.

Which means, of course, tomato risotto! As in, it’s not too late. It’s there if you want it, a little summer wow to help bring in the fall.

Double Sweet Summer Garden Salsa

Growing up, I always loved sweet corn. It was a true summer treat, bought fresh from a local farm and then steamed at home for 5-10 minutes before being rolled around on a satisfying-to-the-sight-now-melting stick of butter (or sprinkled heavily with salt if you’re my dad) and eaten along with the rest of dinner. Yellow, white, or bi-color, it didn’t matter to me so long as it was sweet and fun to eat, which is what it was.

And it still is – and still is that simple to make.

But what else can you make with fresh sweet corn that is similarly simple and tastes great? Double Sweet Summer Garden Salsa! Of course. 🙂

I made it twice this week, the first time because it seemed like a good idea, and the second time to confirm that it was ready for the world. The key ingredients are sweet corn and grape tomatoes, both of which I had growing in my garden.

wpid-wp-1439511733888.jpg

Ready for picking

wpid-wp-1439511758354.jpg

Ready for a close-up

The other fresh ingredients, onions and garlic, I got from my CSA market share. And then the rest – the olive oil, salt, and pepper – were in my cupboard already and ready to go.

Double Sweet Summer Garden Salsa

  • 3 Tbsp olive oil
  • 1 onion, chopped into pieces about the size of corn kernels
  • 1 garlic clove, diced
  • 2 ears sweet corn, kernels removed
  • 25 grape tomatoes, diced
  • 1/4 tsp salt
  • 1/8 tsp pepper
  1. Saute the onion and garlic over medium heat until softened, about 10-15 minutes.
  2. Add the corn and grape tomatoes, and cook for about 15 minutes.
  3. Add the salt and pepper.

And that’s it! Sweet and simple.

The simplest actually would be to do each on its own – an ear of sweet corn husked and then eaten, uncooked, right off the cob (if you’ve never tried it, give it a shot!), and grape tomatoes picked and then popped right in the mouth (it’s more likely you’ve tried this, but if not, give it a shot too!). The combination of sweet corn and sweet grape tomatoes, though, with a touch of the natural tomato tartness, is worth the extra time. And what’s 30 minutes in the end when you’re making something else at the same time that takes a little longer (fresh tomato sauce in my case this time).

wpid-wp-1439511648108.jpg

On the cutting board

wpid-wp-1439511625246.jpg

In the frying pan

wpid-wp-1439511604531.jpg

And in the blue dish

You can eat it hot or cold, but I like it hot.

I’ve been eating it straight like a side dish, but it would also be good with chips or as a taco, burrito, veggie burger, or salad topping. Hmmmm, maybe another name for it could be sweet corn and grape tomato summer salad dressing.

However you use it, and whether the ingredients come from your garden or the farm, there it is, Double Sweet Summer Garden Salsa. Enjoy! Two summer sweets brought together.


Eggplant Parmesan Sloppy Joes

If I ever had a restaurant, this would go on the menu.

wpid-img_20141117_205933.jpg

It’s quick, easy, uses whole ingredients, and is delicious.

I made it for the first time about a month ago, shortly after making the regular Eggplant Parmesan. I had gotten another eggplant and some tomatoes from the farm share, and to try something new, I decided to make tomato sauce with diced eggplant. At some point along the way, I remembered I also still had fresh bread crumbs and Parmesan and mozzarella. So I added them, too. The result: awesome Sloppy Joes. 

Eggplant Parmesan Sloppy Joes

The ingredients

  • 1/4 cup olive oil
  • 1 large onion, diced
  • 3 garlic cloves, diced
  • 1 eggplant, diced
  • 3 tomatoes, diced
  • 2 handfuls arugula
  • 1 ¾ cup bread crumbs
  • 3/4 cup fresh Parmesan, grated
  • 3/4 cup fresh mozzarella, grated
  • 1 ⅝ tsp salt

The steps:

  1. Heat the oil in a frying pan over medium heat
  2. Add the onions and garlic, and sauté until soft, about 15 minutes
  3. Add the eggplant and tomatoes, and simmer over medium heat until the eggplant is mostly soft, about 30 minutes
  4. Add the arugula
  5. Add the bread crumbs
  6. Add the Parmesan and mozzarella
  7. And then add the salt

Here’s how everything looked at the beginning, when I made it this week.

wpid-img_20141117_190550.jpg

The first step was dicing the vegetables.

The onion (I used three small ones in place of one large one this time)

The onions (I used three small onions this time)

Garlic

Garlic

wpid-img_20141117_193254.jpg

Eggplant (remember to peel first)

wpid-img_20141117_195158.jpg

And the tomatoes

To save time, I actually did the dicing in two parts. I diced the onions and garlic first, and then while they were sauteing in the olive oil, I diced the eggplant and tomatoes.

wpid-img_20141117_195047.jpg

The onions and garlic, looking good after 15 minutes

Once the onions and garlic were ready, I added the eggplant and tomatoes.

wpid-img_20141117_195300.jpg

I’ve found that when cooking eggplant, the key for me is to cook it long enough so that it no longer has its initial toughness, but not so long that it becomes completely soft. A 30-minute simmer worked well in this case.

With the eggplant cooked, I then added the rest of the ingredients: the arugula, bread crumbs, and Parmesan and mozzarella.

wpid-img_20141117_202444.jpg

The arugula

wpid-img_20141117_203004.jpg

Bread crumbs

wpid-img_20141117_203248.jpg

wpid-img_20141117_203916.jpg

And the Parmesan and mozzarella

And then I added the salt and was done!

If you don’t have arugula, you could also try spinach or chard, or leave it out. I like the extra color and taste that the arugula leaves add to the Sloppy Joe mixture, and they go well, too, as an extra topping in the bun. This time I added arugula and a few tomato slices to the bun. An extra piece of mozzarella or Parmesan is another great addition.

wpid-img_20141117_205933.jpg

And if you have small crackers and plum tomatoes, you can also make little Sloppy Joe bites!

wpid-img_20141117_205544.jpg

wpid-img_20141117_205635.jpg

Whether as an appetizer or the main course, I’ll definitely be making this again. It’s like Eggplant Parmesan, but inverted, and in the same category of awesome.

Eggplant Parmesan, Part 3b

So how much sauce can you make from this many tomatoes?

wpid-img_20141008_195718.jpg

Let’s find out! And take a look at some pictures.

Part 3: Tomato sauce

So the recipe, as you may know, actually appears in the previous post. I enjoyed writing it, and it pretty much covers the important things. I think part of the art is making it your own – figuring out what you like and also improvising – and for me and tomato sauce, I often just take whatever I have on hand and go from there. The recipe is the process.

Among the many things I like about cooking, one is that that no matter what you do, it usually turns out alright in the end. And if something doesn’t work out, that’s okay too. Only have dried oregano instead fresh, or no oregano at all? It’s still going to be good. Or decide to let it simmer for an extra hour, on purpose or by accident? Still going to taste good. Or want to try a mix of yellow and red tomatoes? It’s going to look and taste good.

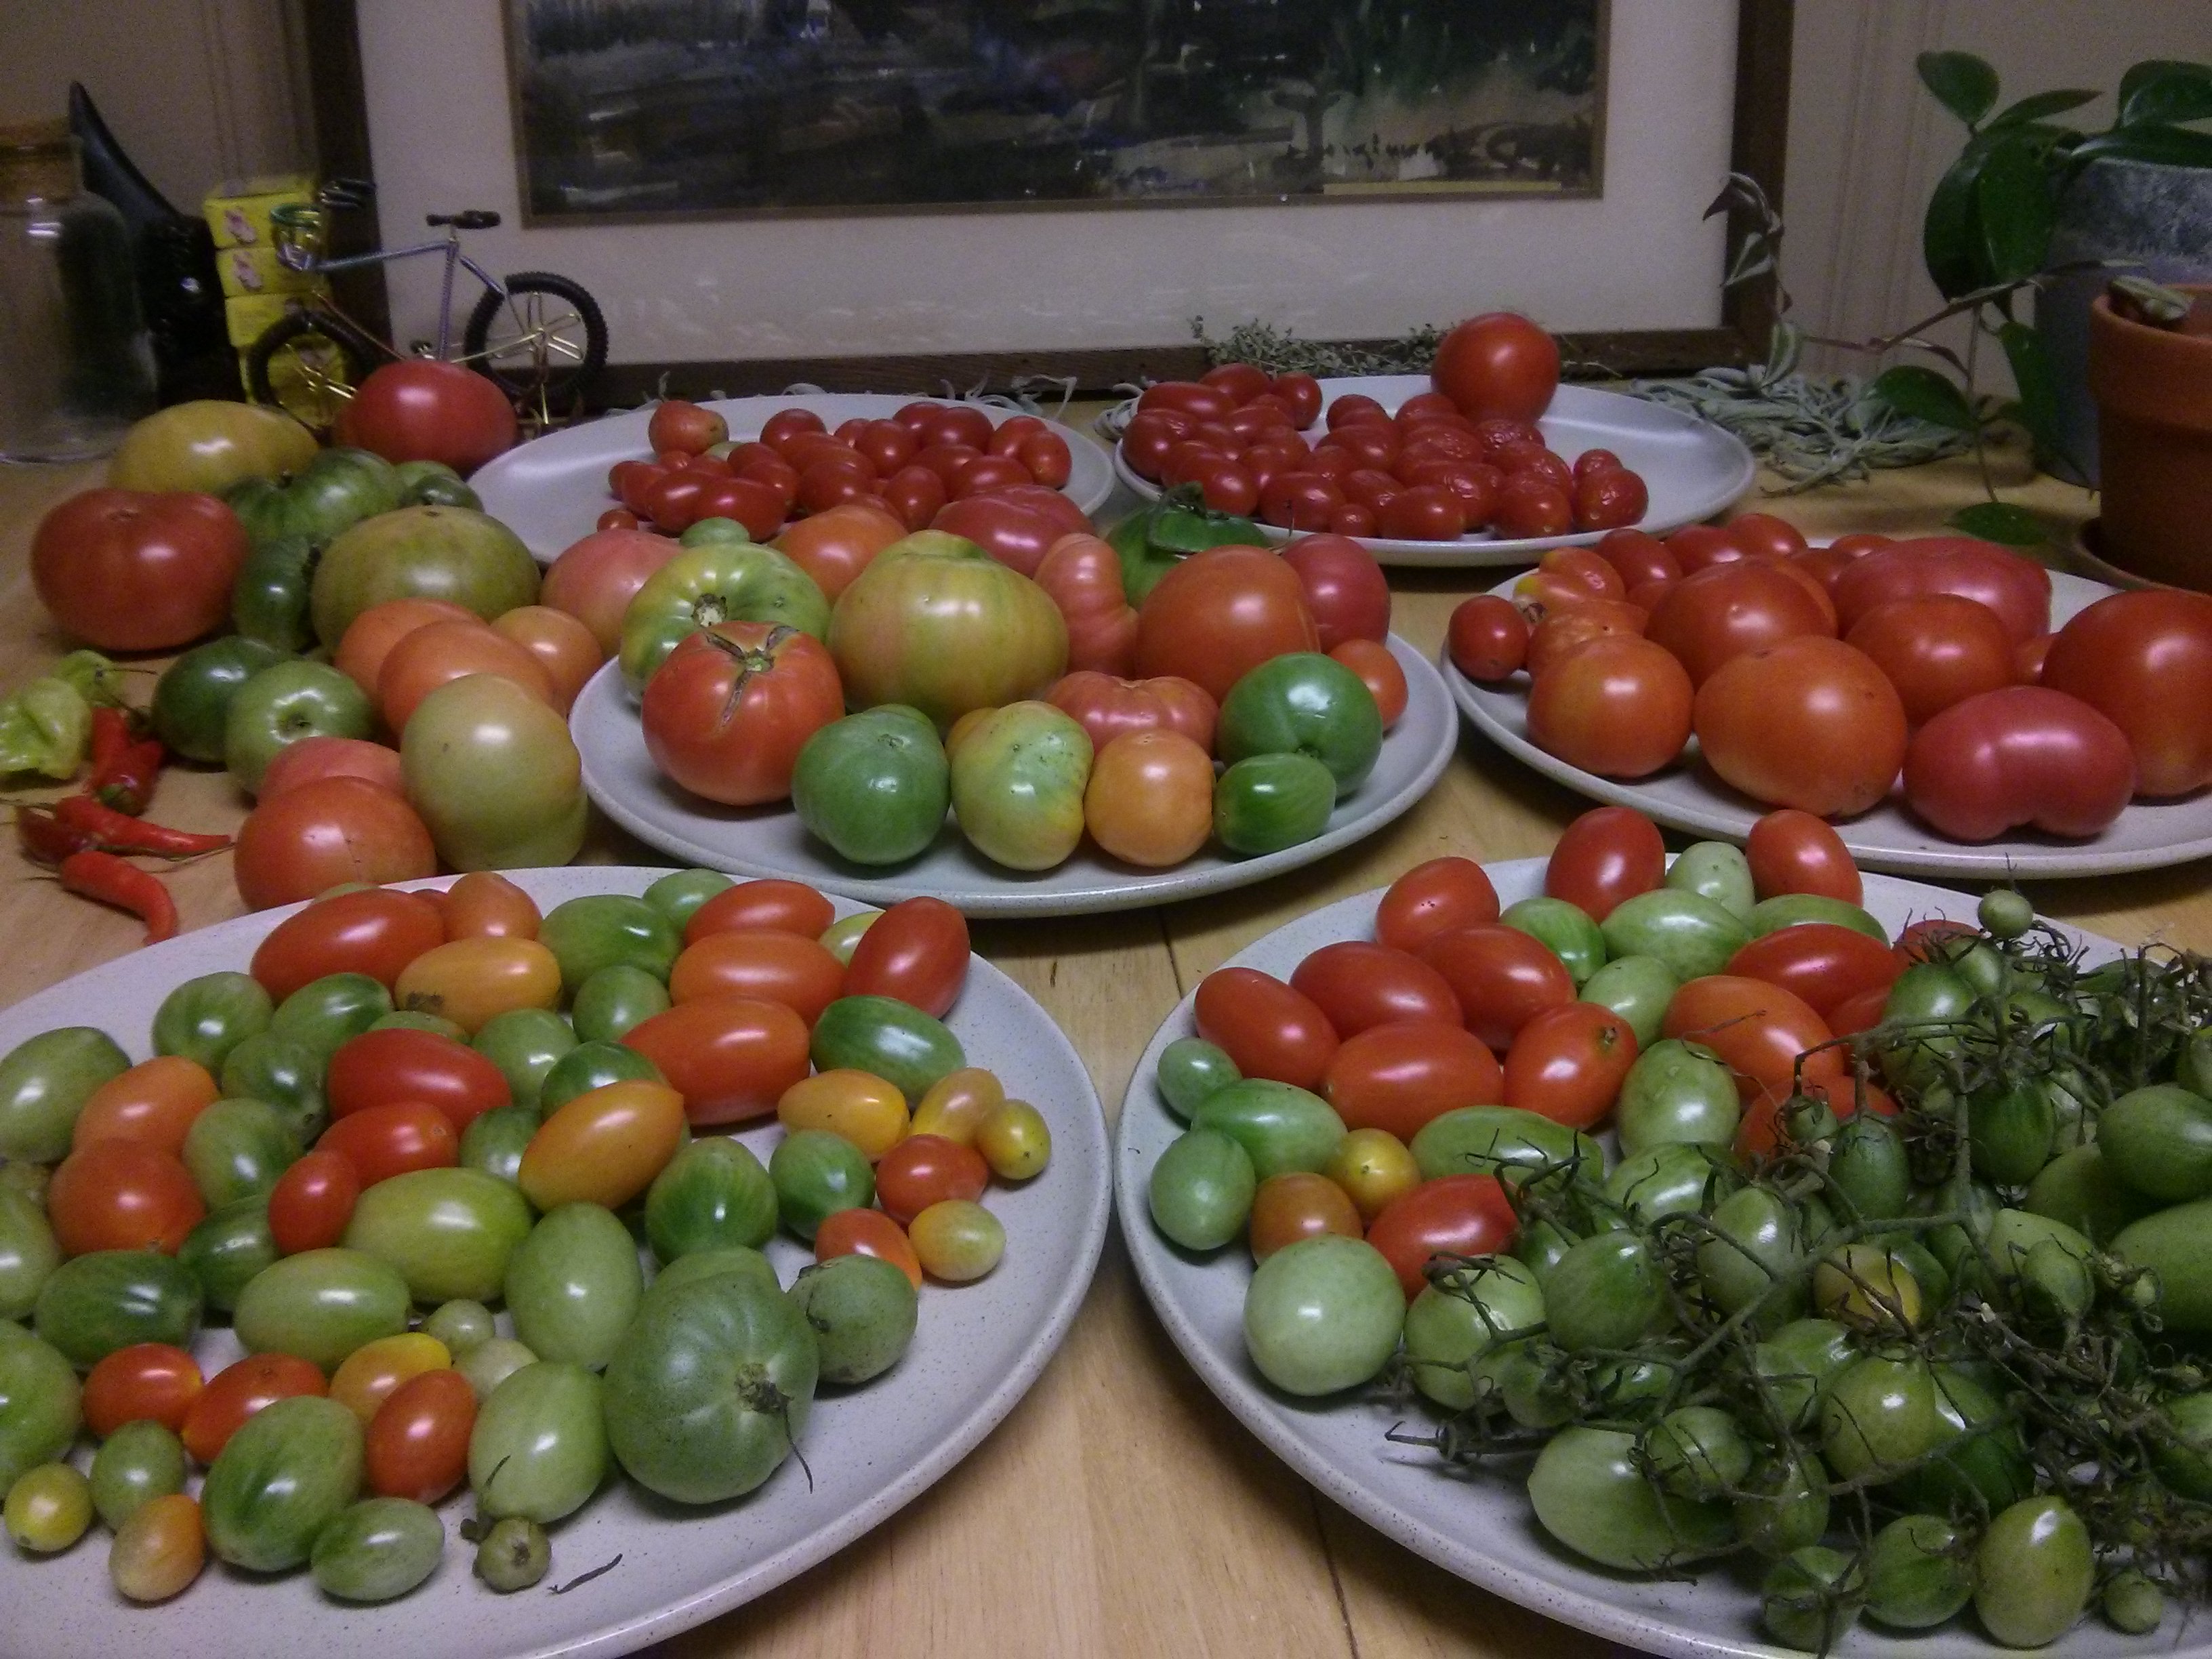
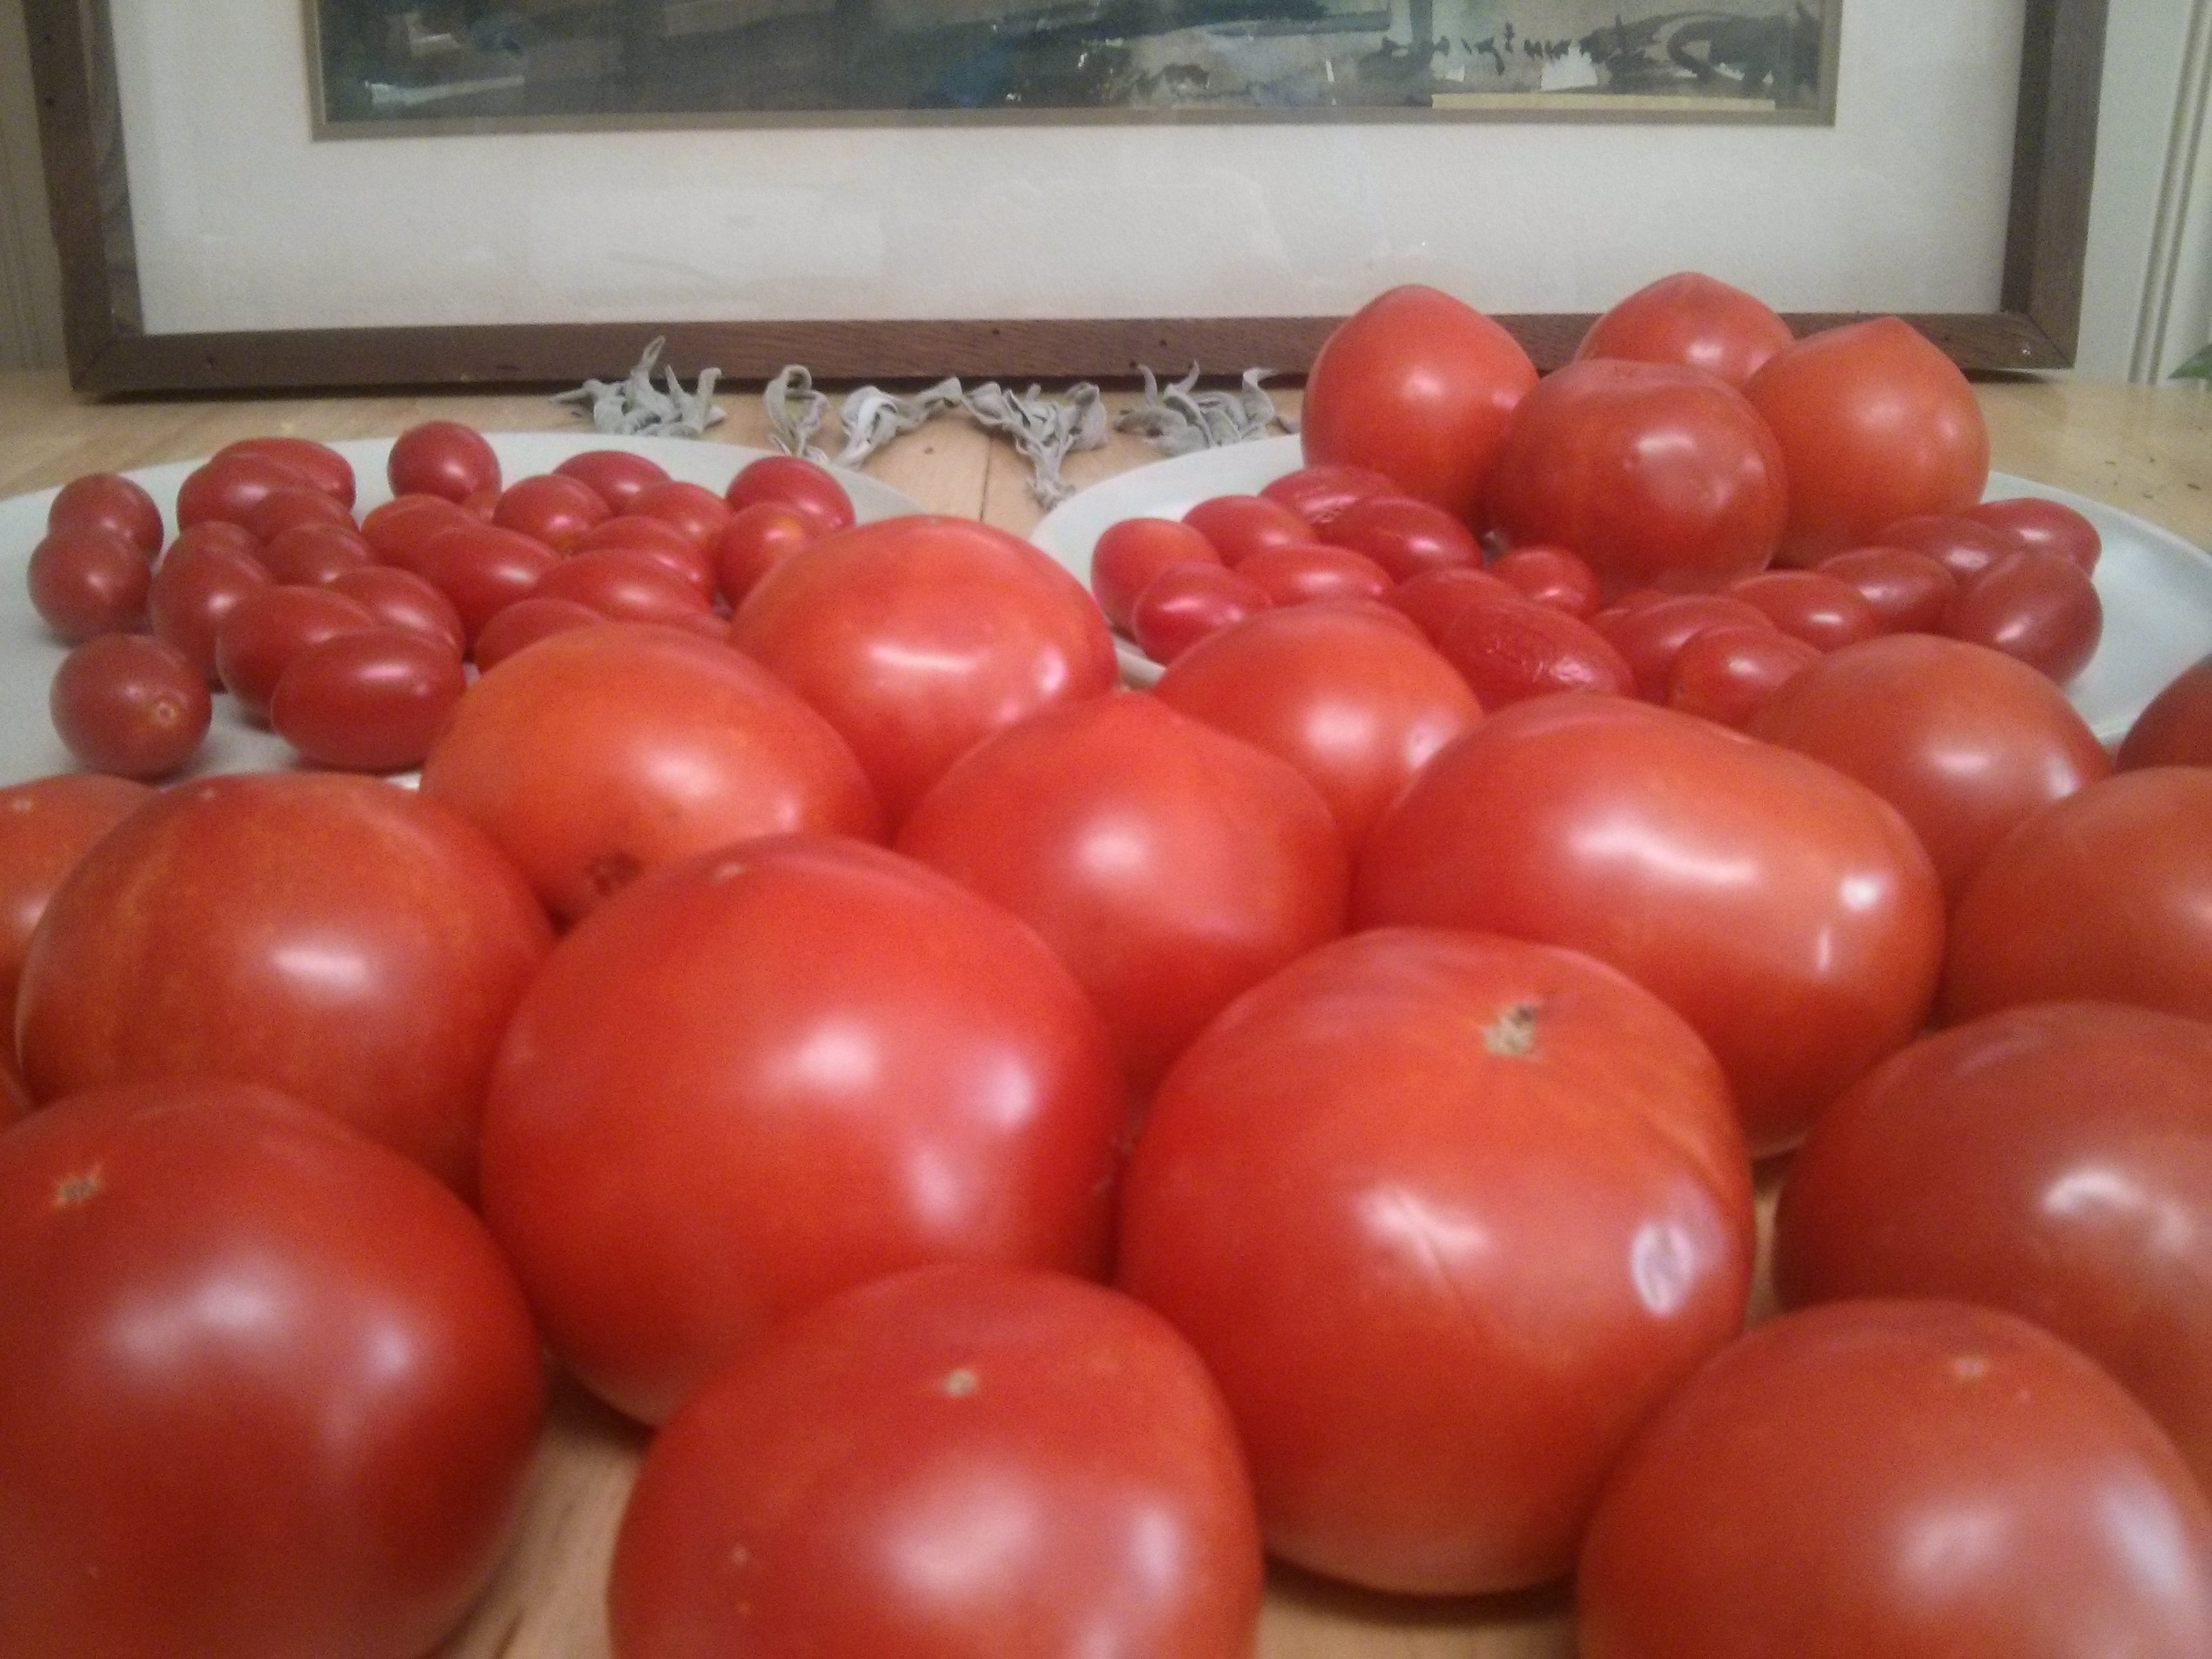
This time around, I had a mix of round slicing tomatoes, red plum ones, and a few small tomatoes too. Here are the steps and how everything came together:

Step 1

wpid-img_20141008_200540.jpg

The first step is cutting the stems out of the large tomatoes. This makes it easier to peel and save the skins later on (after step 2). Because the stems on the plum tomatoes and smaller tomatoes are so small, they’re fine to stay in.

Step 2

wpid-img_20141008_203344.jpg

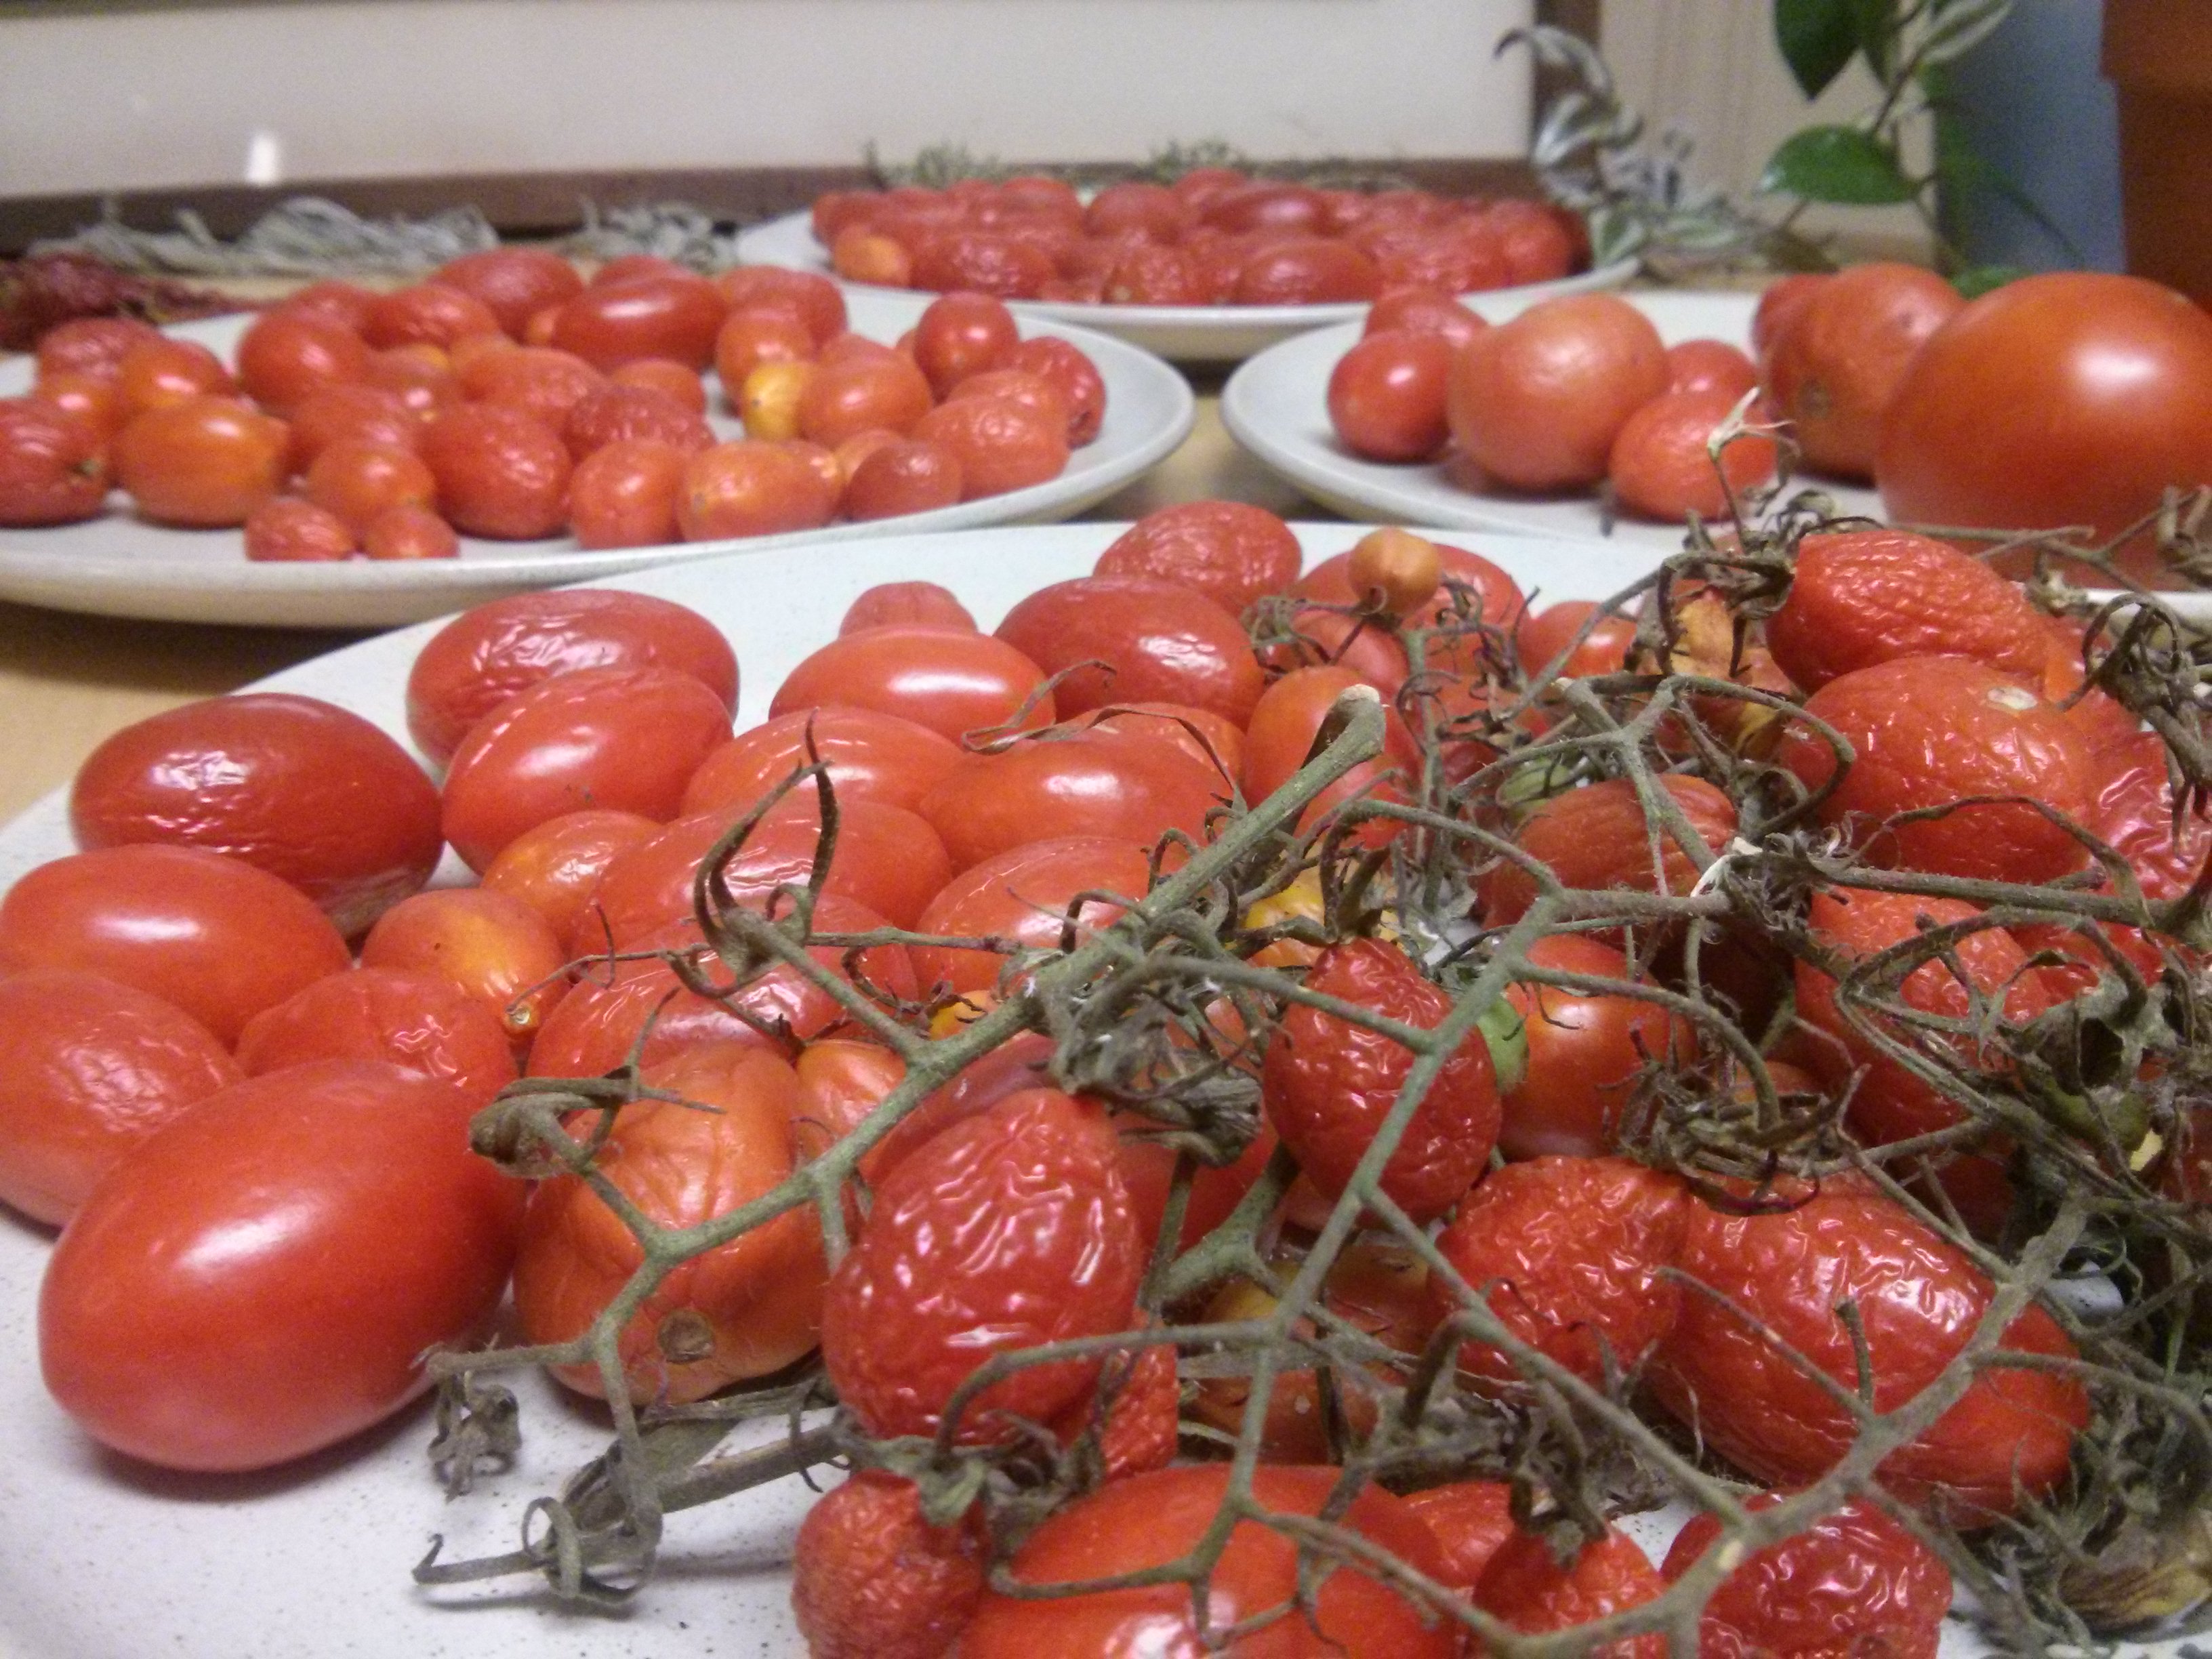
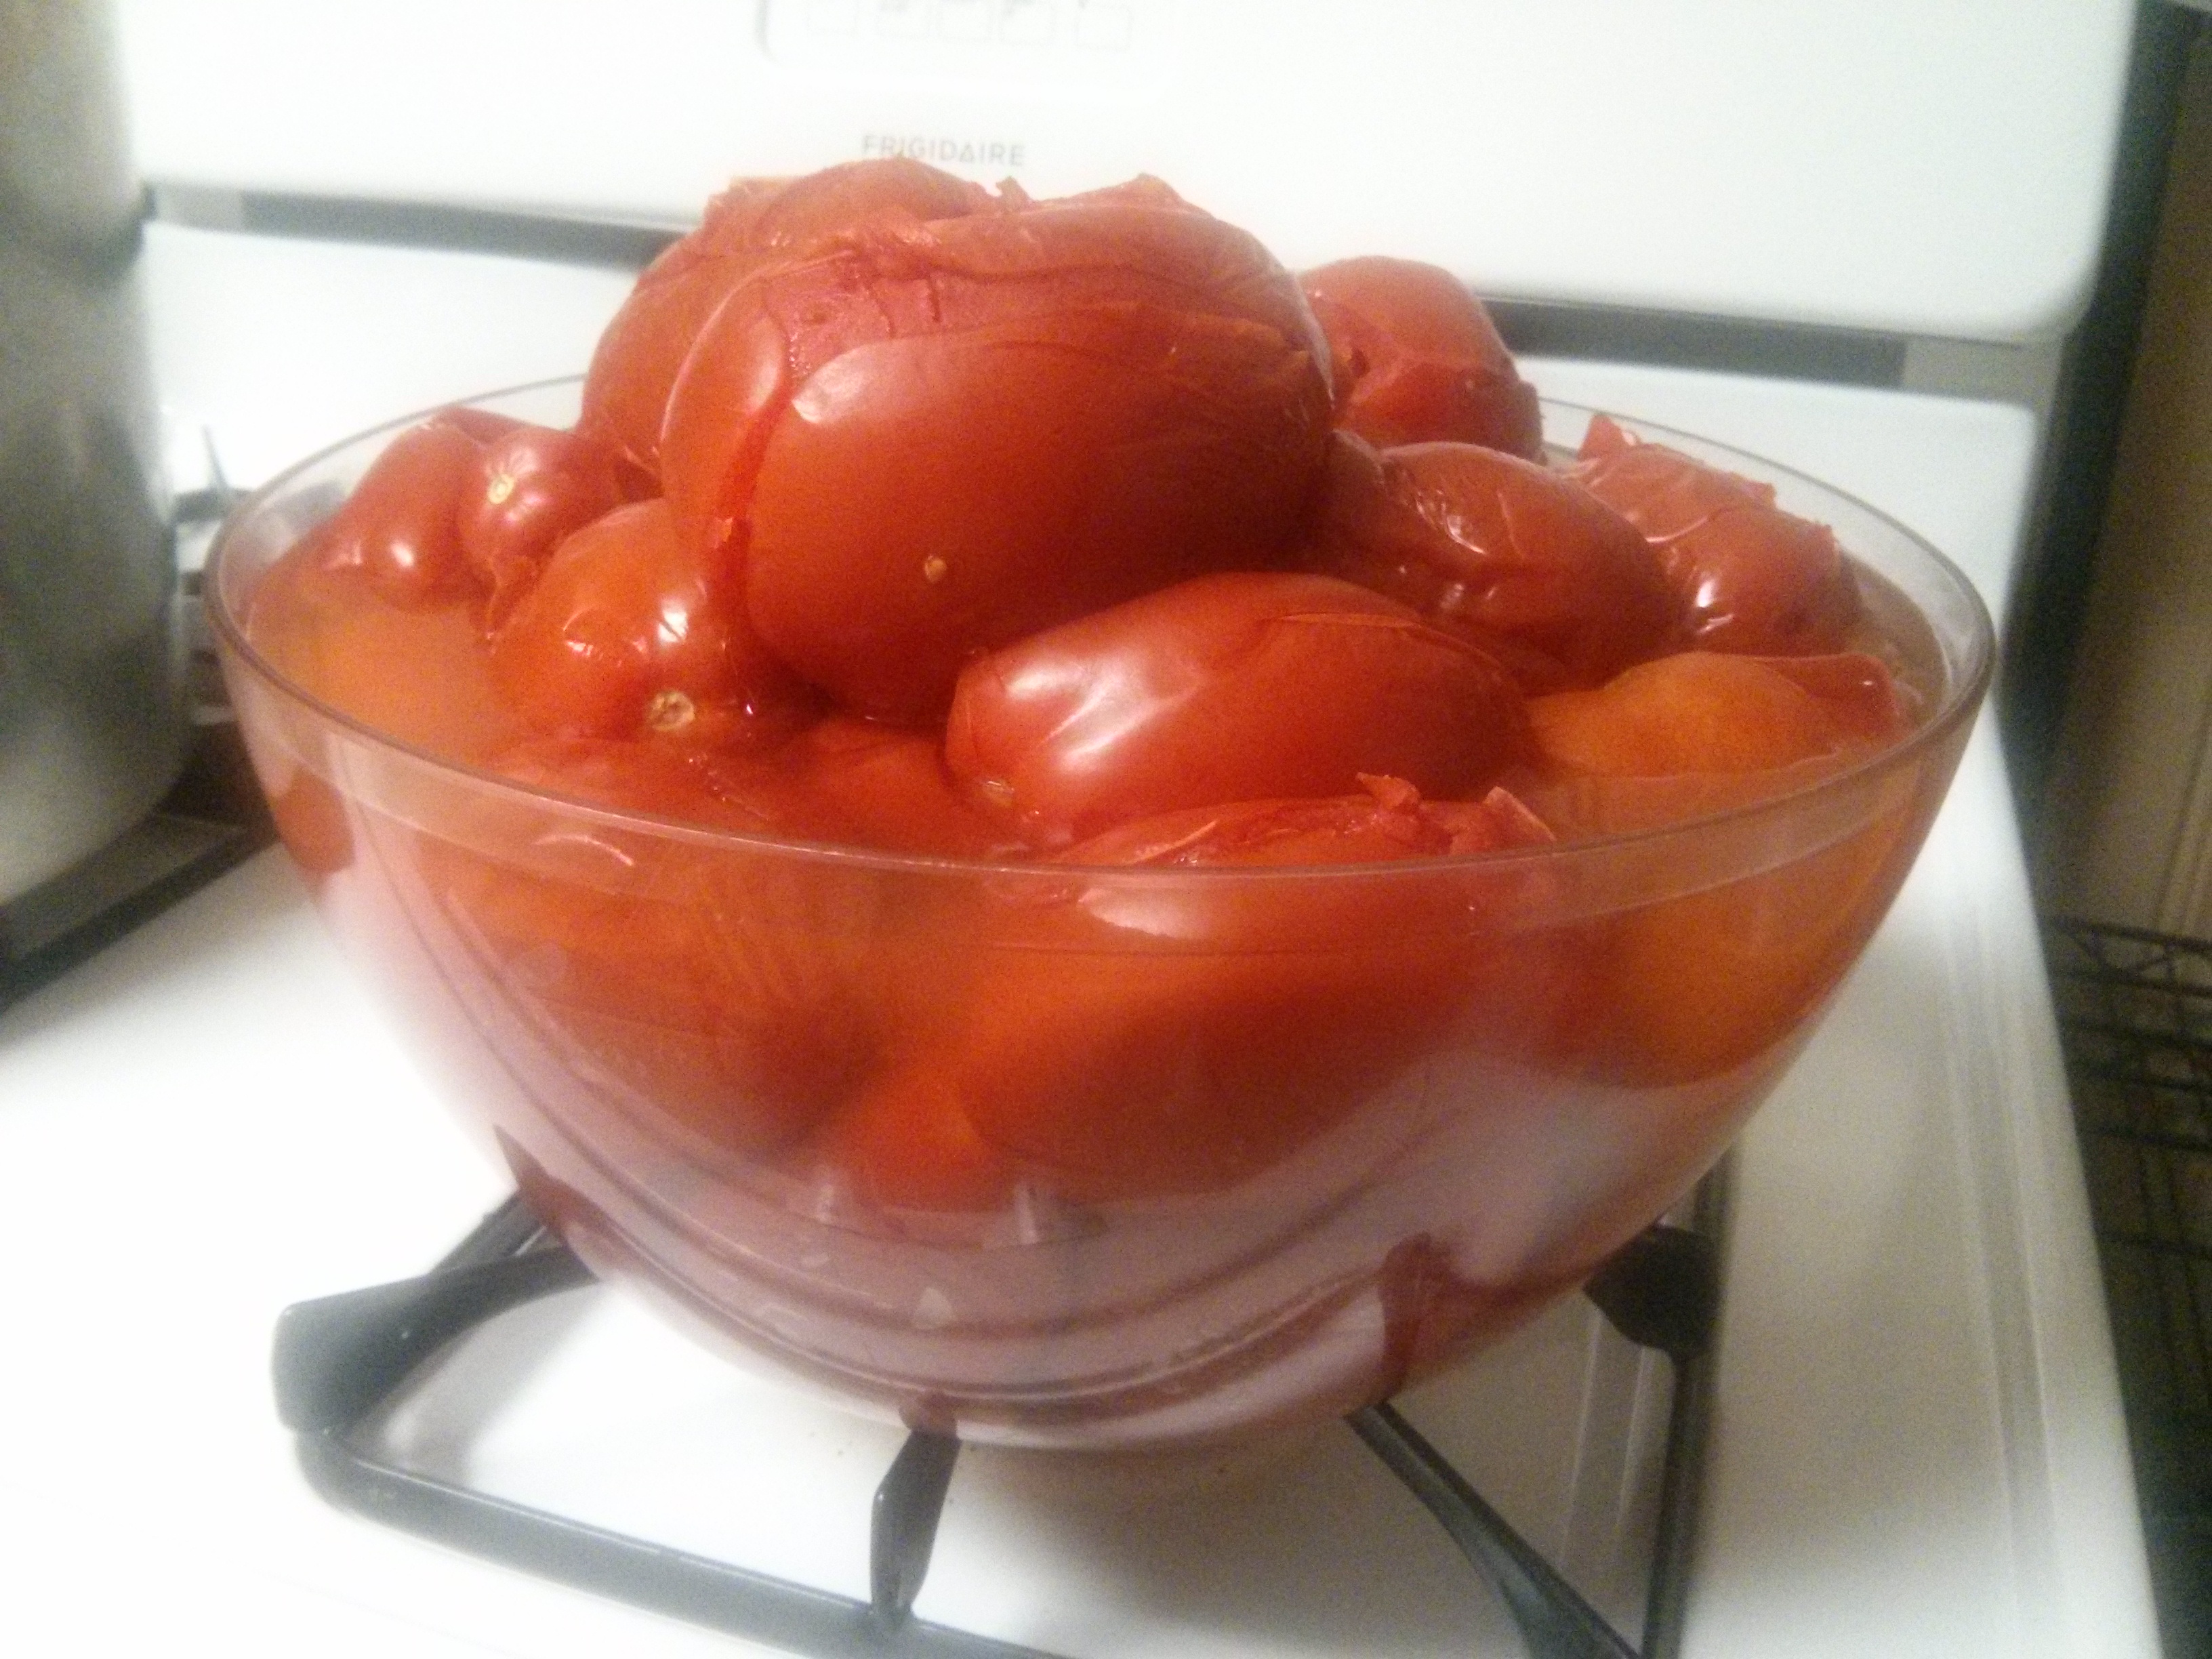
The next step is boiling a pot of water and putting the tomatoes in. The purpose here is to crack and loosen the skins and to partially cook and soften the tomatoes.

Some recipes say to leave the tomatoes in for just a minute or two, to only work the skins (in which case more of the tomato-cooking/simmering will happen later), but I’ve been leaving them in longer, sometimes 15-30 minutes, meaning I’ll do some of the initial cooking during this initial step. This also makes it easier to break the tomatoes into smaller pieces later.

I take the tomatoes out of the boiling water when they’re half or more soft, but can still hold their shape. If the tomatoes are at different stages of ripeness and if some are large and some are small, they’ll be ready to be taken out at different times.

wpid-img_20141008_211105.jpg

wpid-img_20141008_211157.jpg

How about those cracked skins?

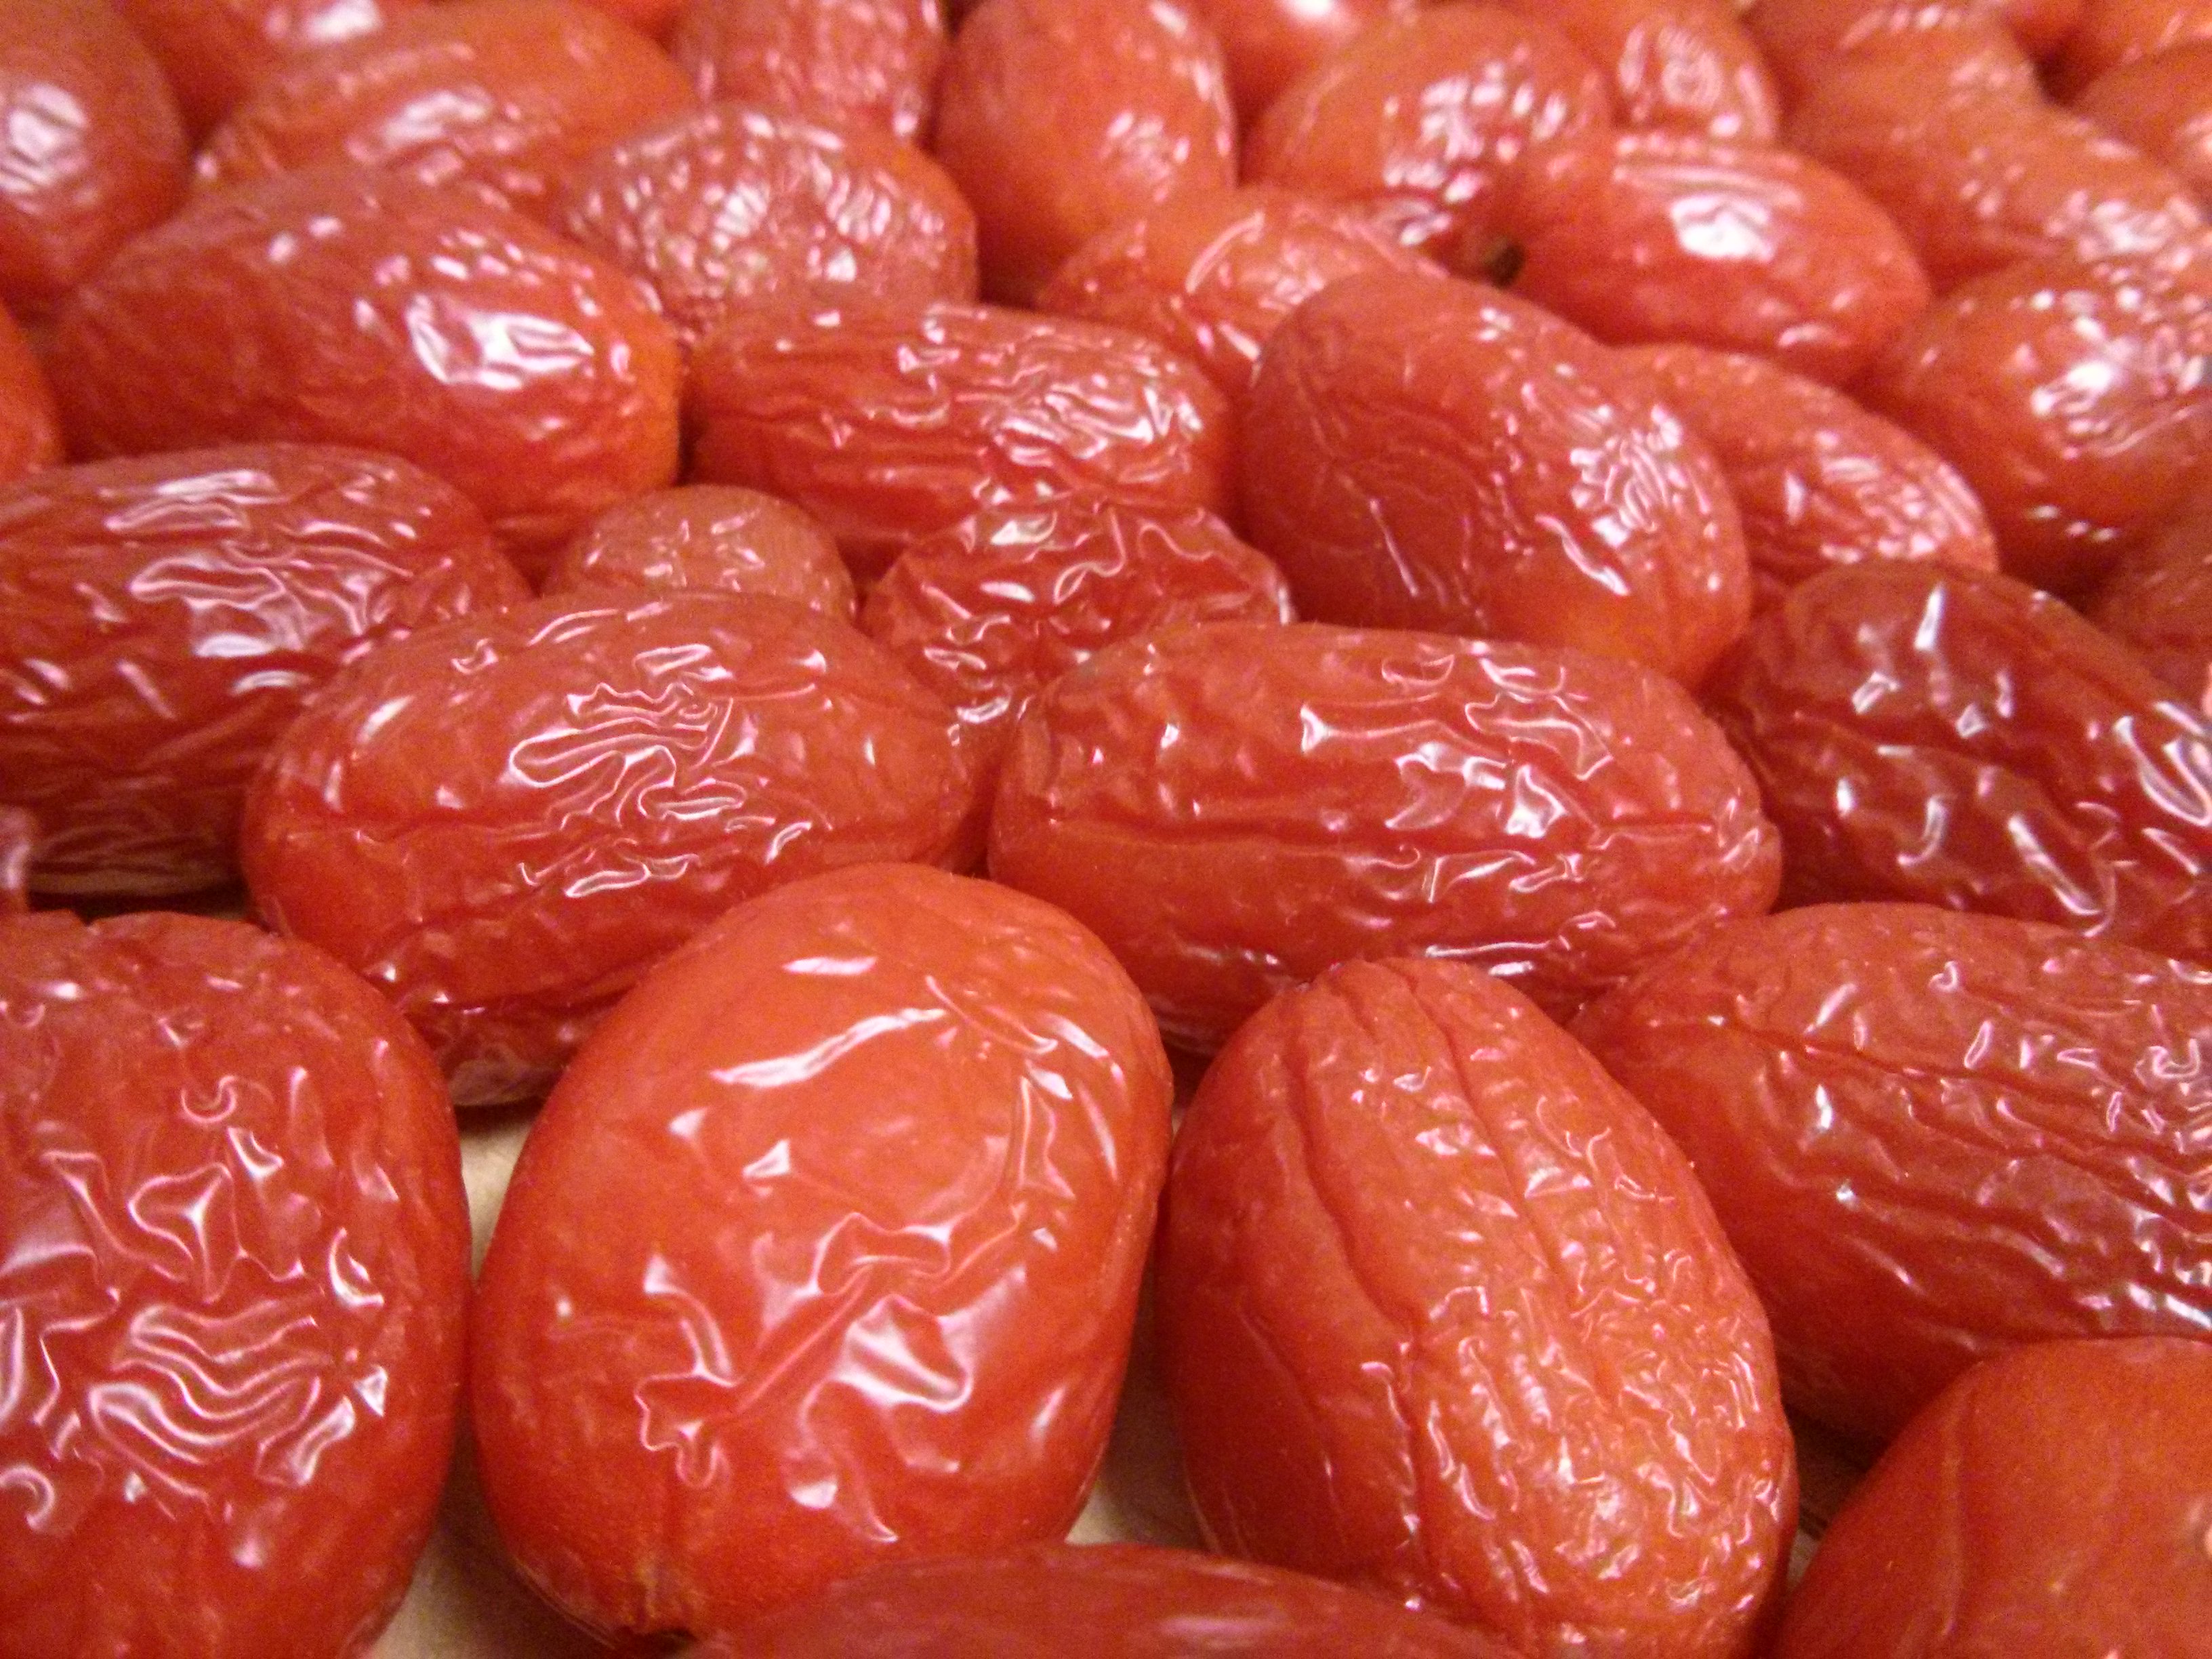
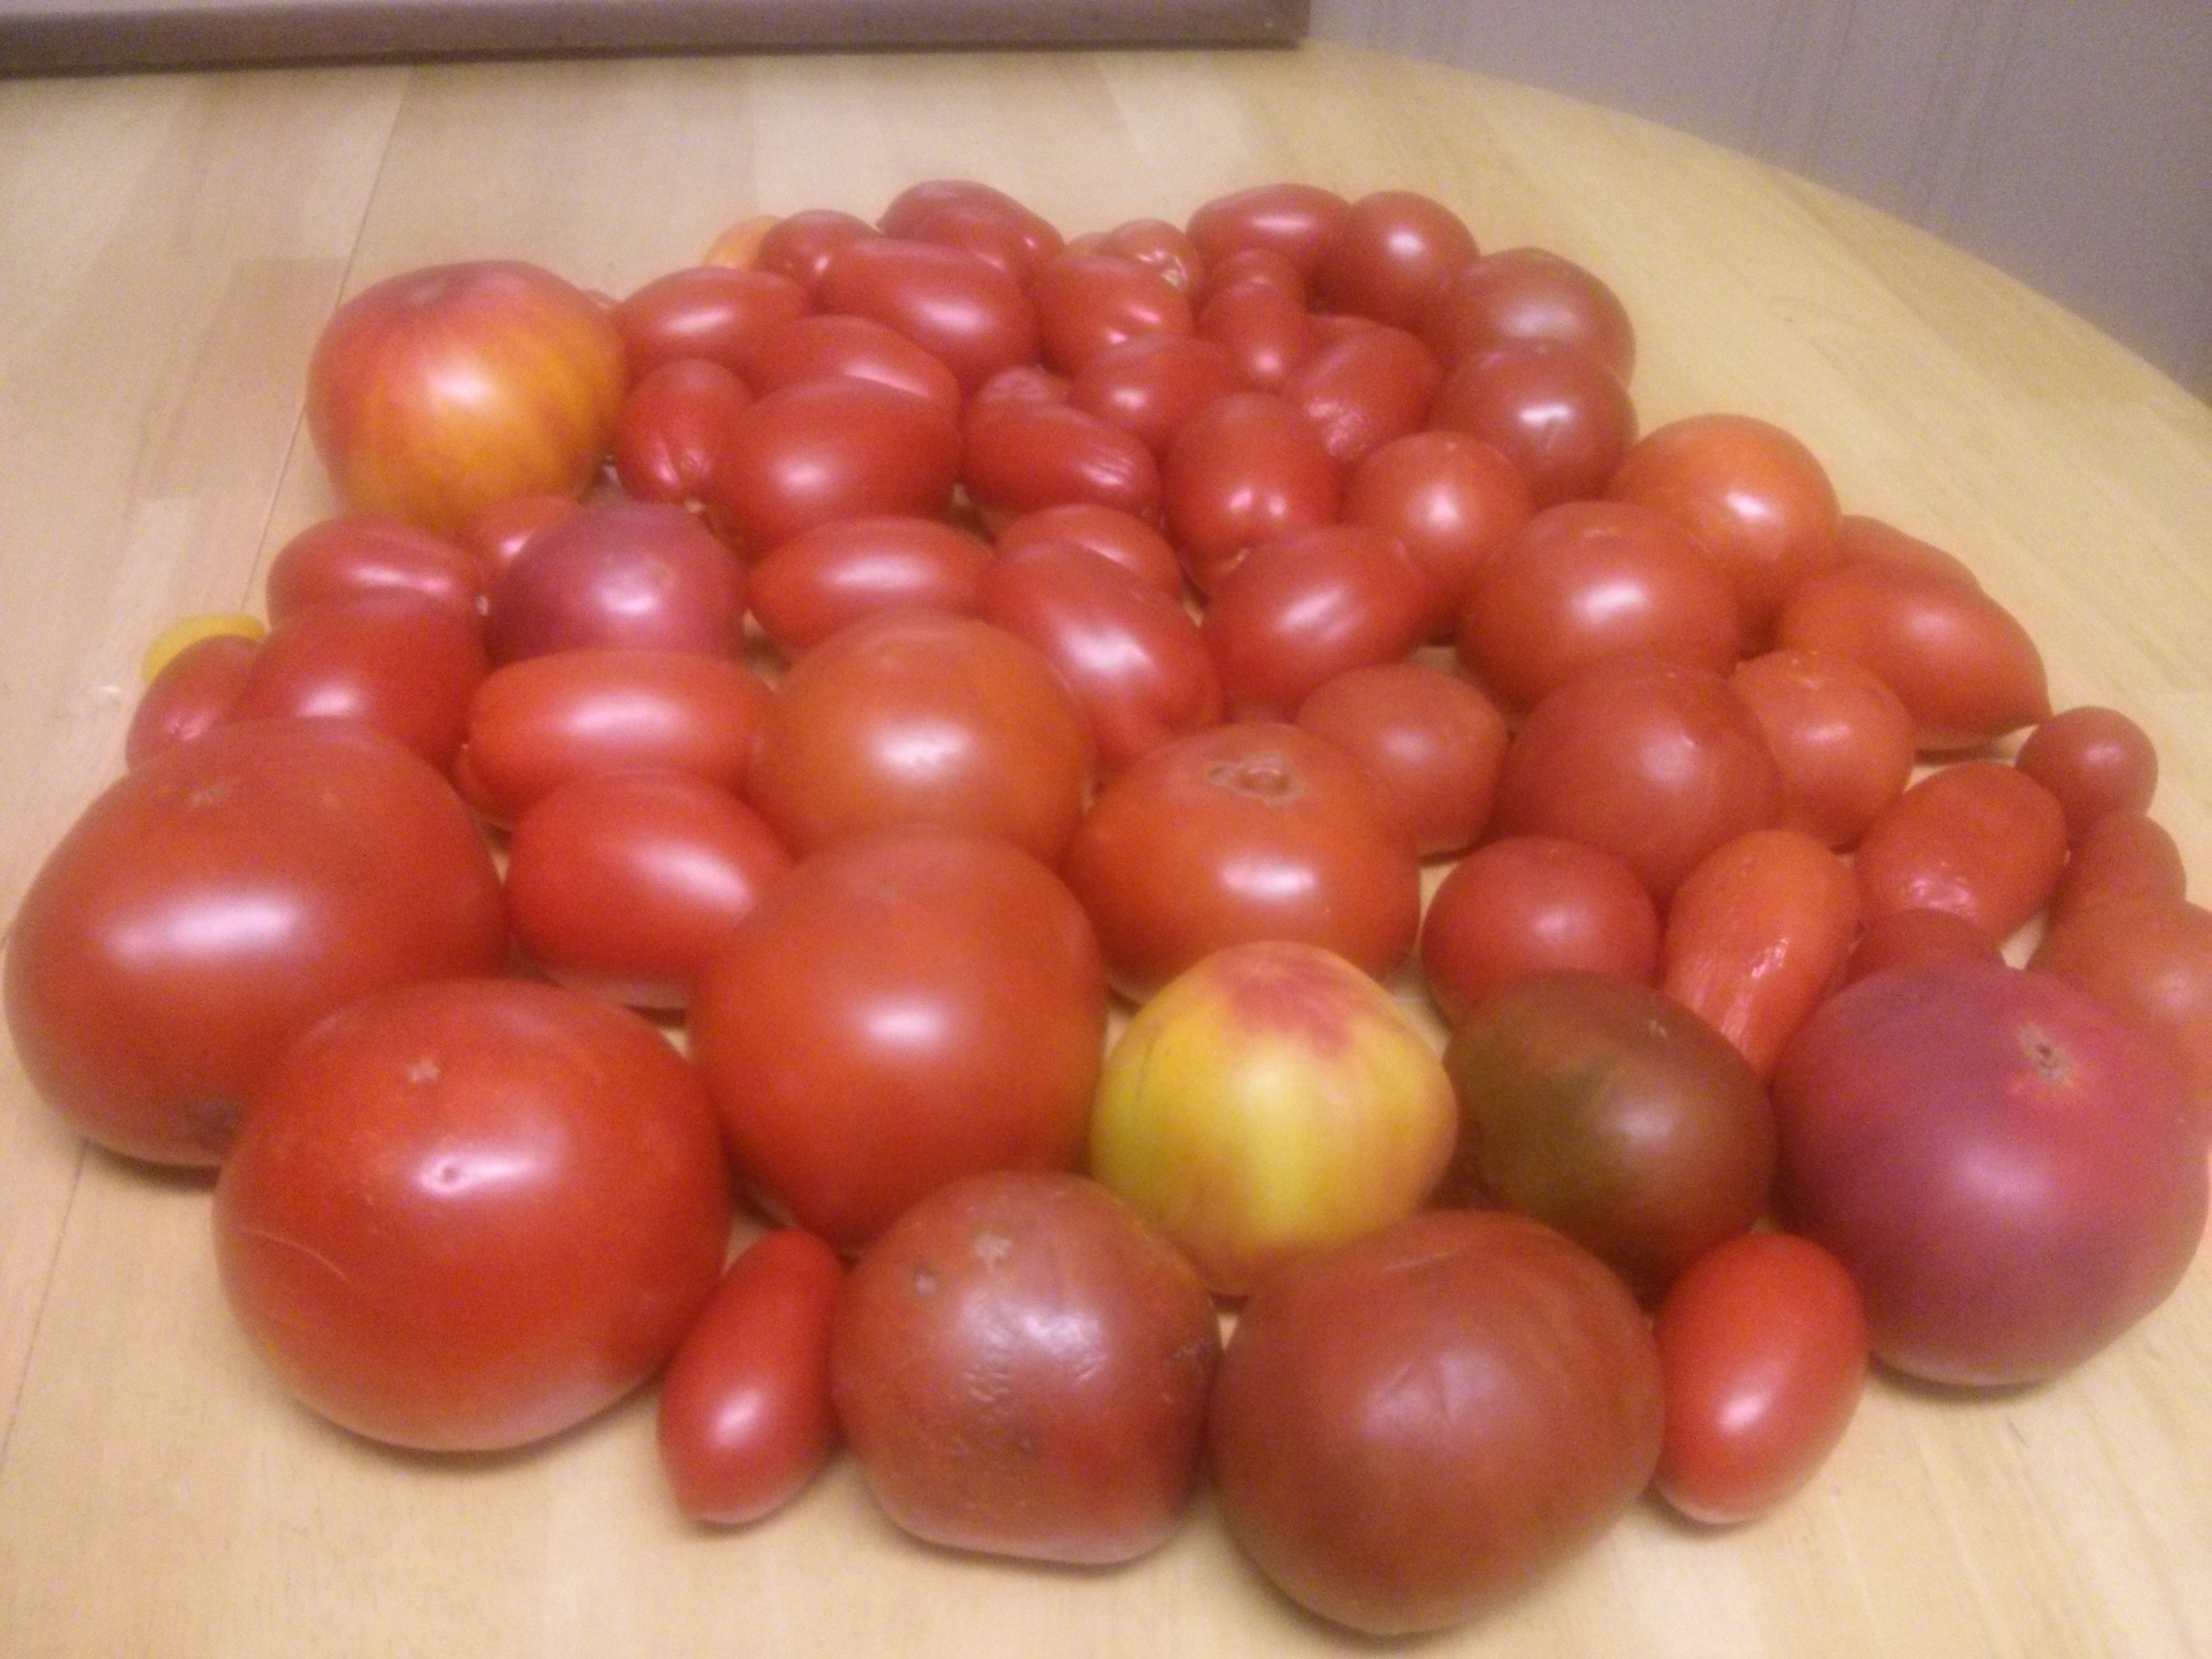
This is how the tomatoes looked after their hot water bath. When I measured the volume of this bowl later using water, I found that the bowl holds 160 oz. That’s ten pounds! That’s also the equivalent, in terms of 28-oz cans of crushed tomatoes, of more than 5 1/2 such cans.

Step 3

wpid-img_20141009_201916.jpg

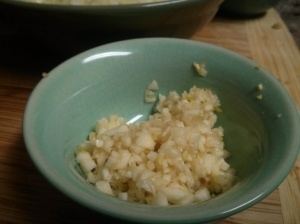
The next step is prepping the onions and garlic for the sauce. This means dicing and sautéing them in olive oil until they’re soft.

wpid-img_20141009_202900.jpg

The onions

wpid-img_20141009_203521.jpg

The garlic

wpid-img_20141009_210726.jpg

The sauté

I used two large onions and three cloves of garlic this time. For the oil, I started with 1/2 cup, which might sound like a lot, but there was also a lot of tomatoes, and the olive oil helps to make for a richer sauce. If I were making a smaller batch of sauce, I might start with one onion and one garlic clove.

Step 4

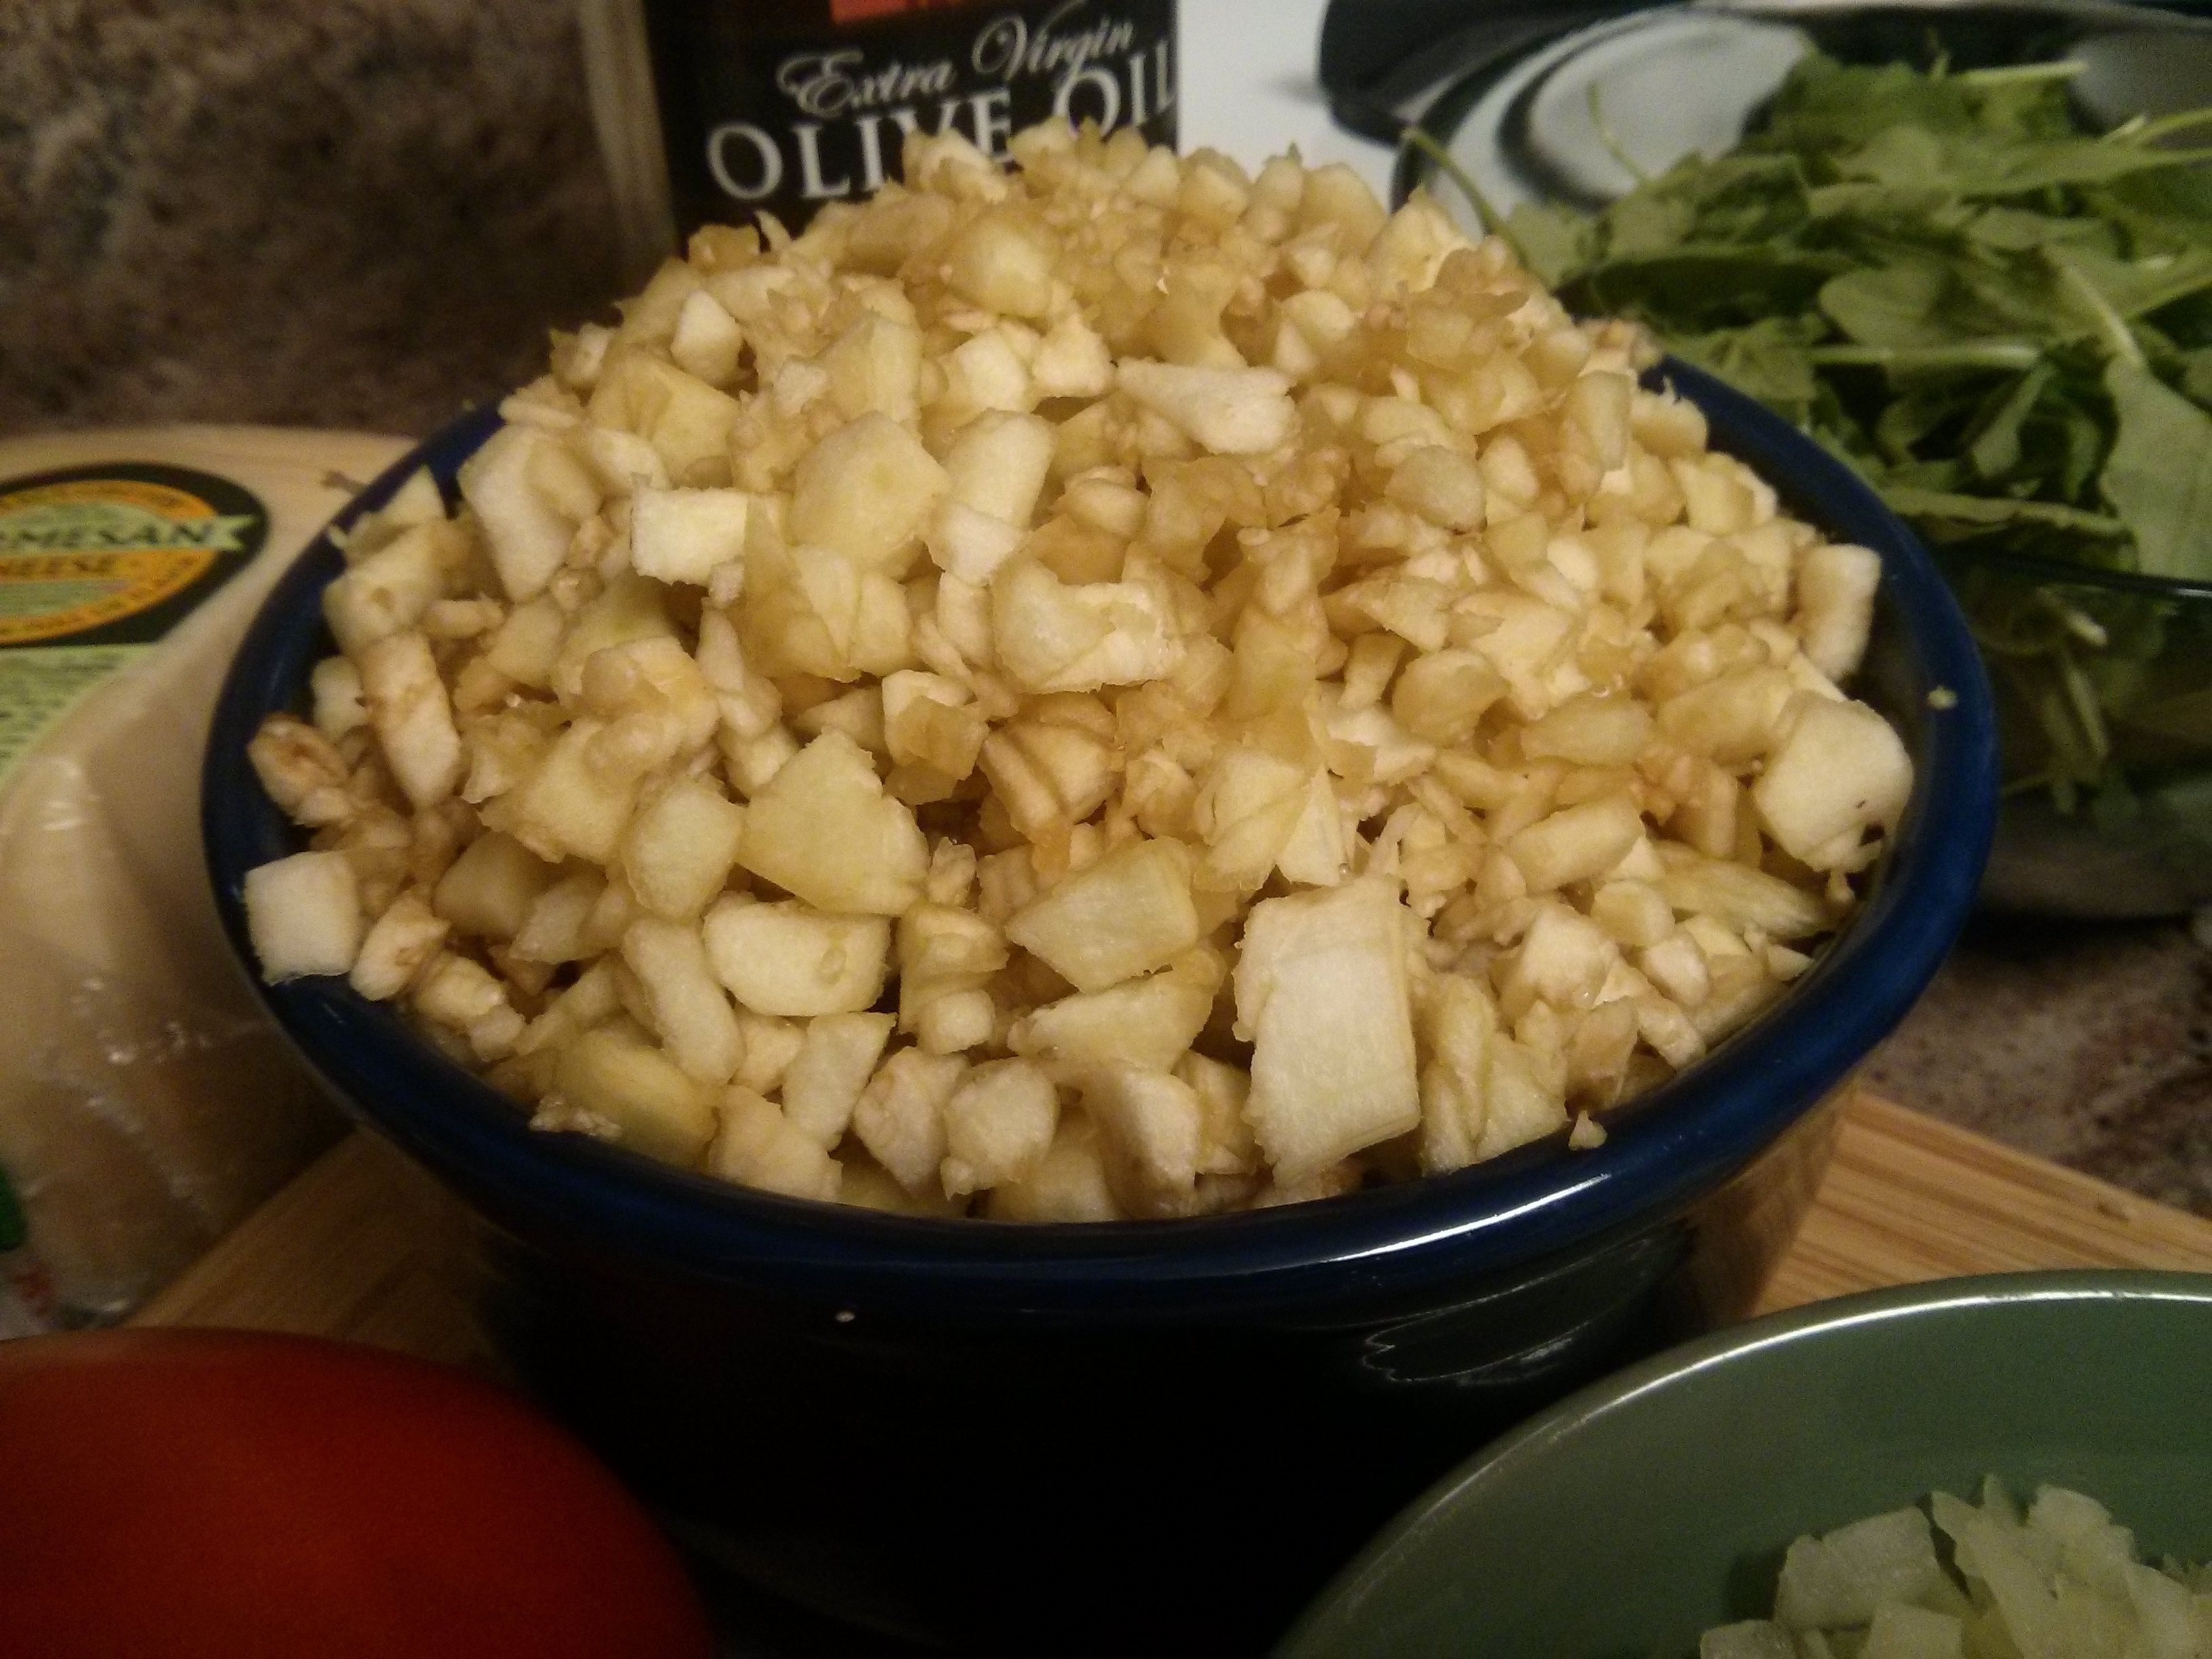
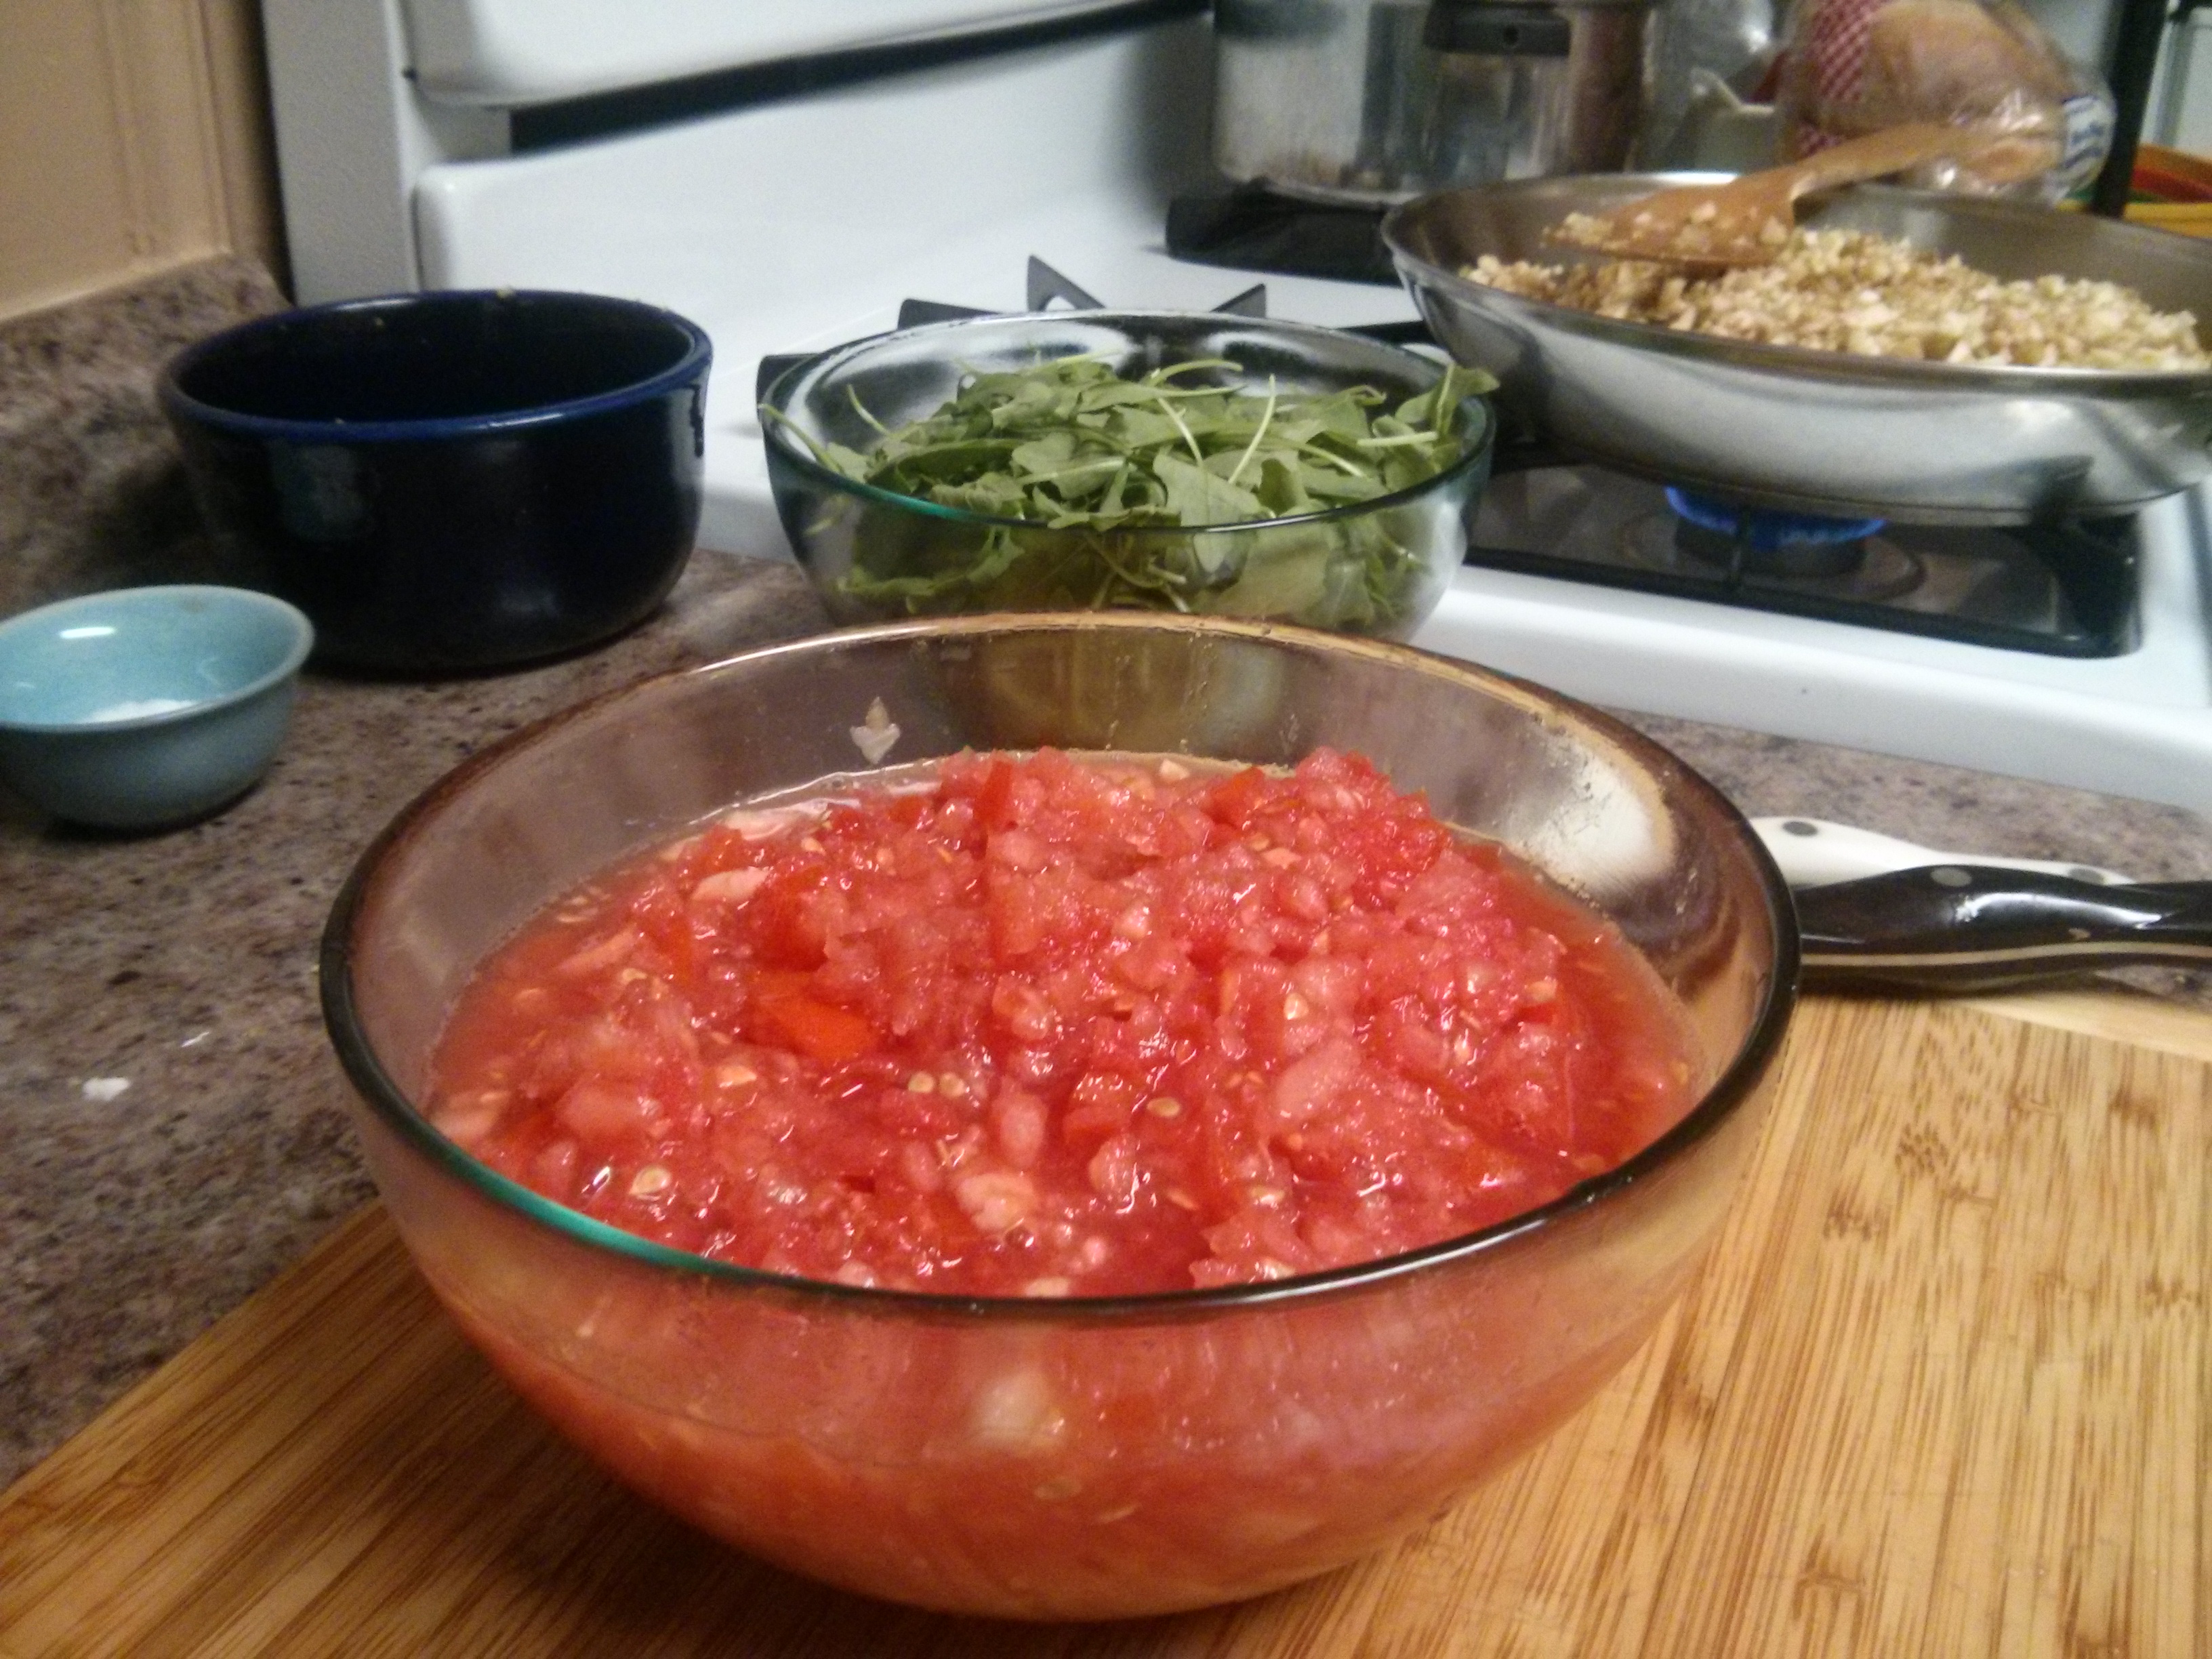
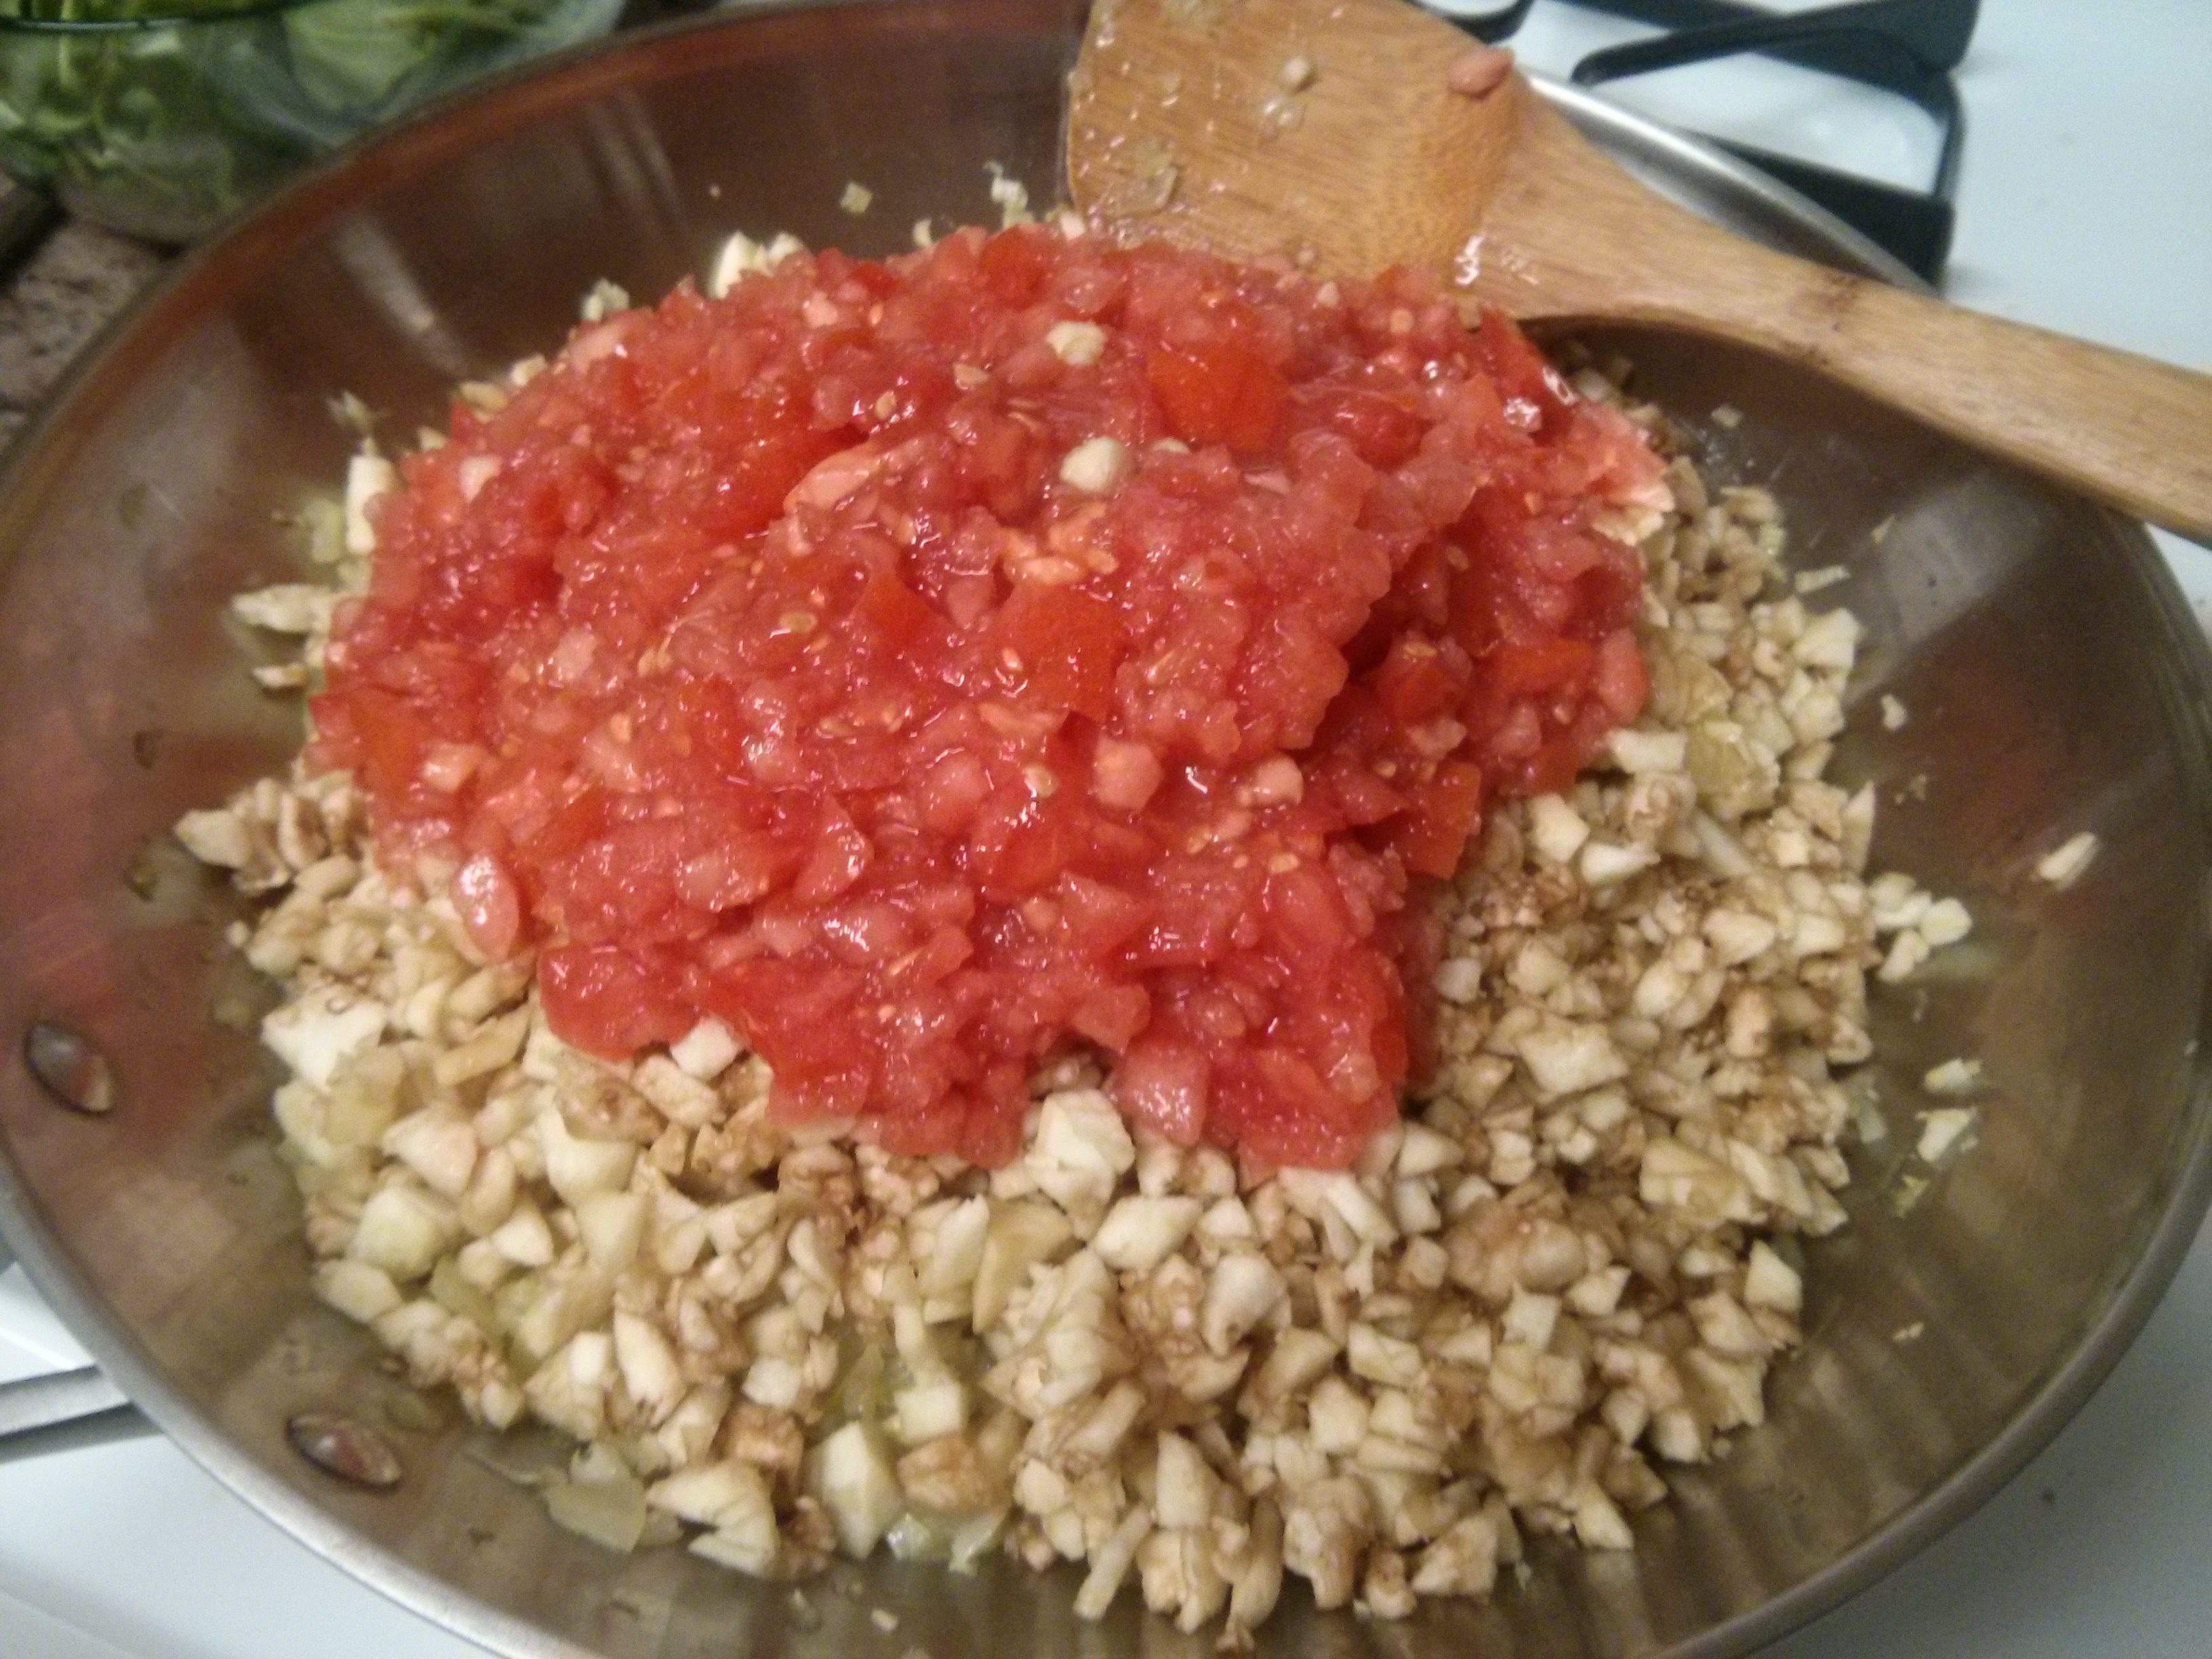
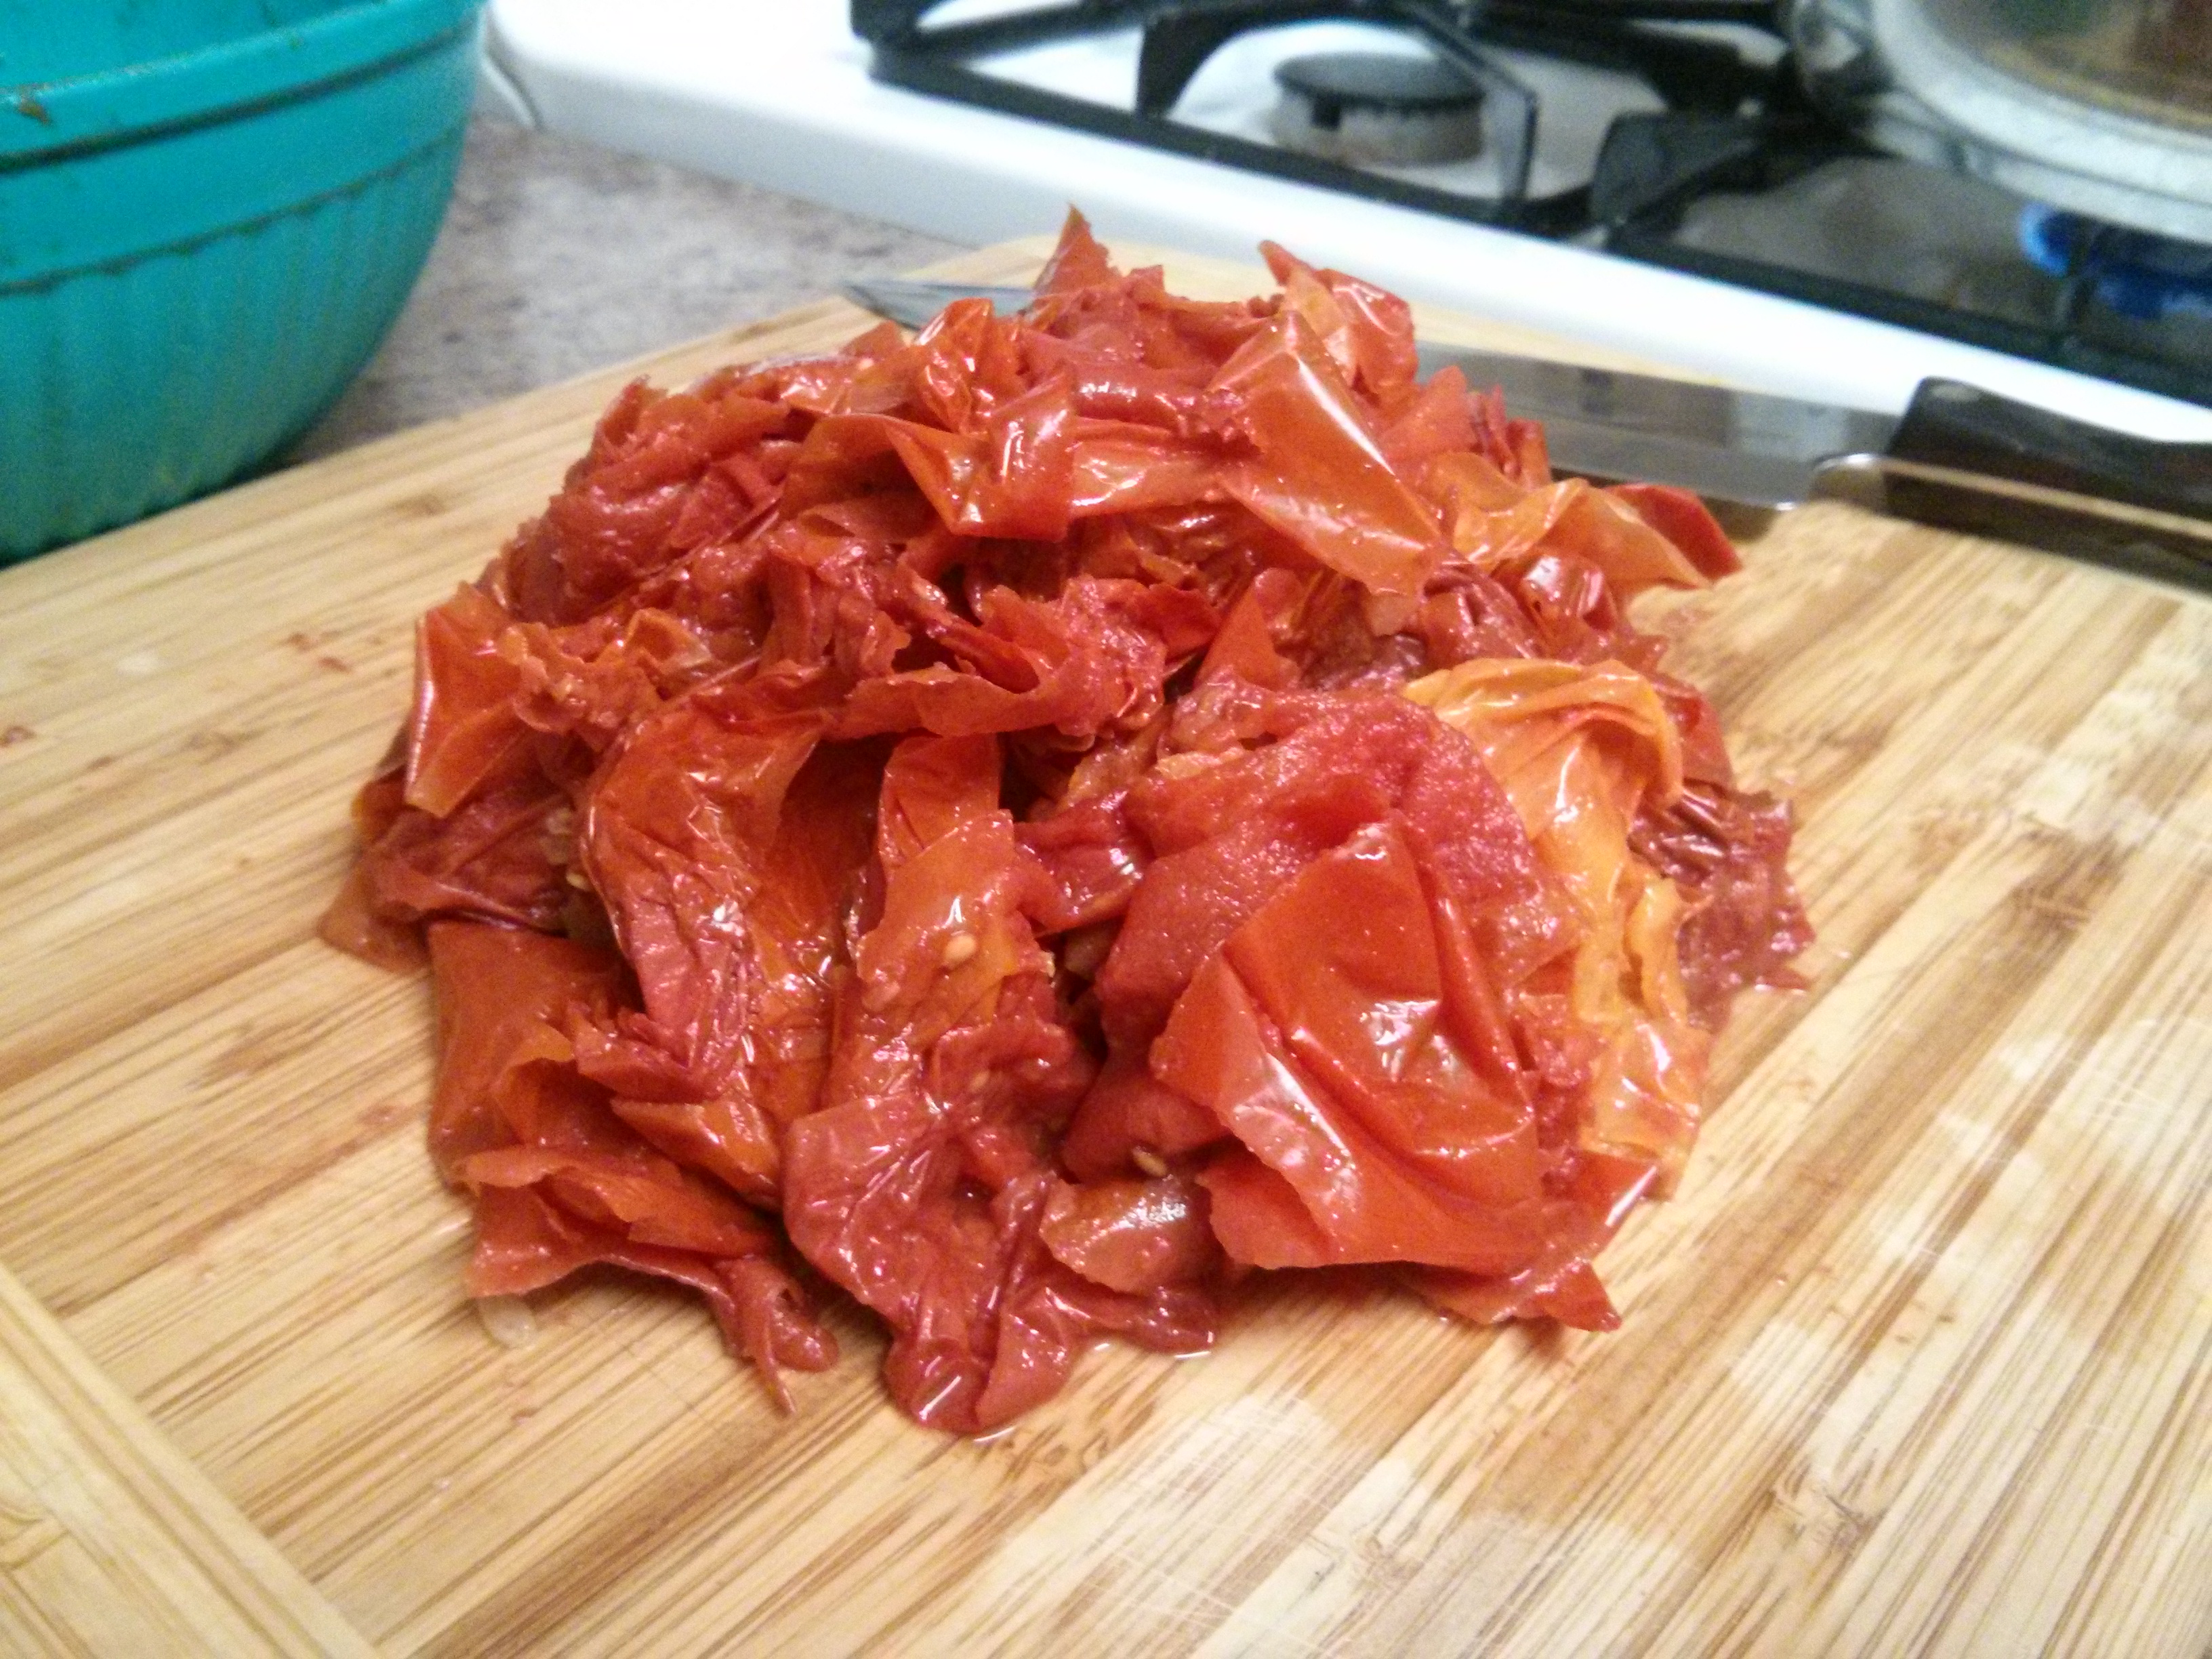
After the onions and garlic are ready, transfer them to a large pot and add the tomatoes (after first having removed the tomatoes’ skins). Some recipes also say to remove the tomatoes’ seeds, but the seeds don’t bother me so I’ve never done that.

With the tomatoes now in the pot, at this point you can also break the them into smaller pieces using a wooden spoon, potato masher, or other kitchen implement that is up to the task. The tomato sauce can then be left to simmer while finishing the rest of the recipe.

 wpid-img_20141009_210435.jpg

Above is how the tomatoes looked (L) after removing the skins (R). I also poured out (and saved for another day) the extra tomato liquid so that the future sauce would be thicker. In this case, the extra liquid amounted to a full 32 oz.

Step 5

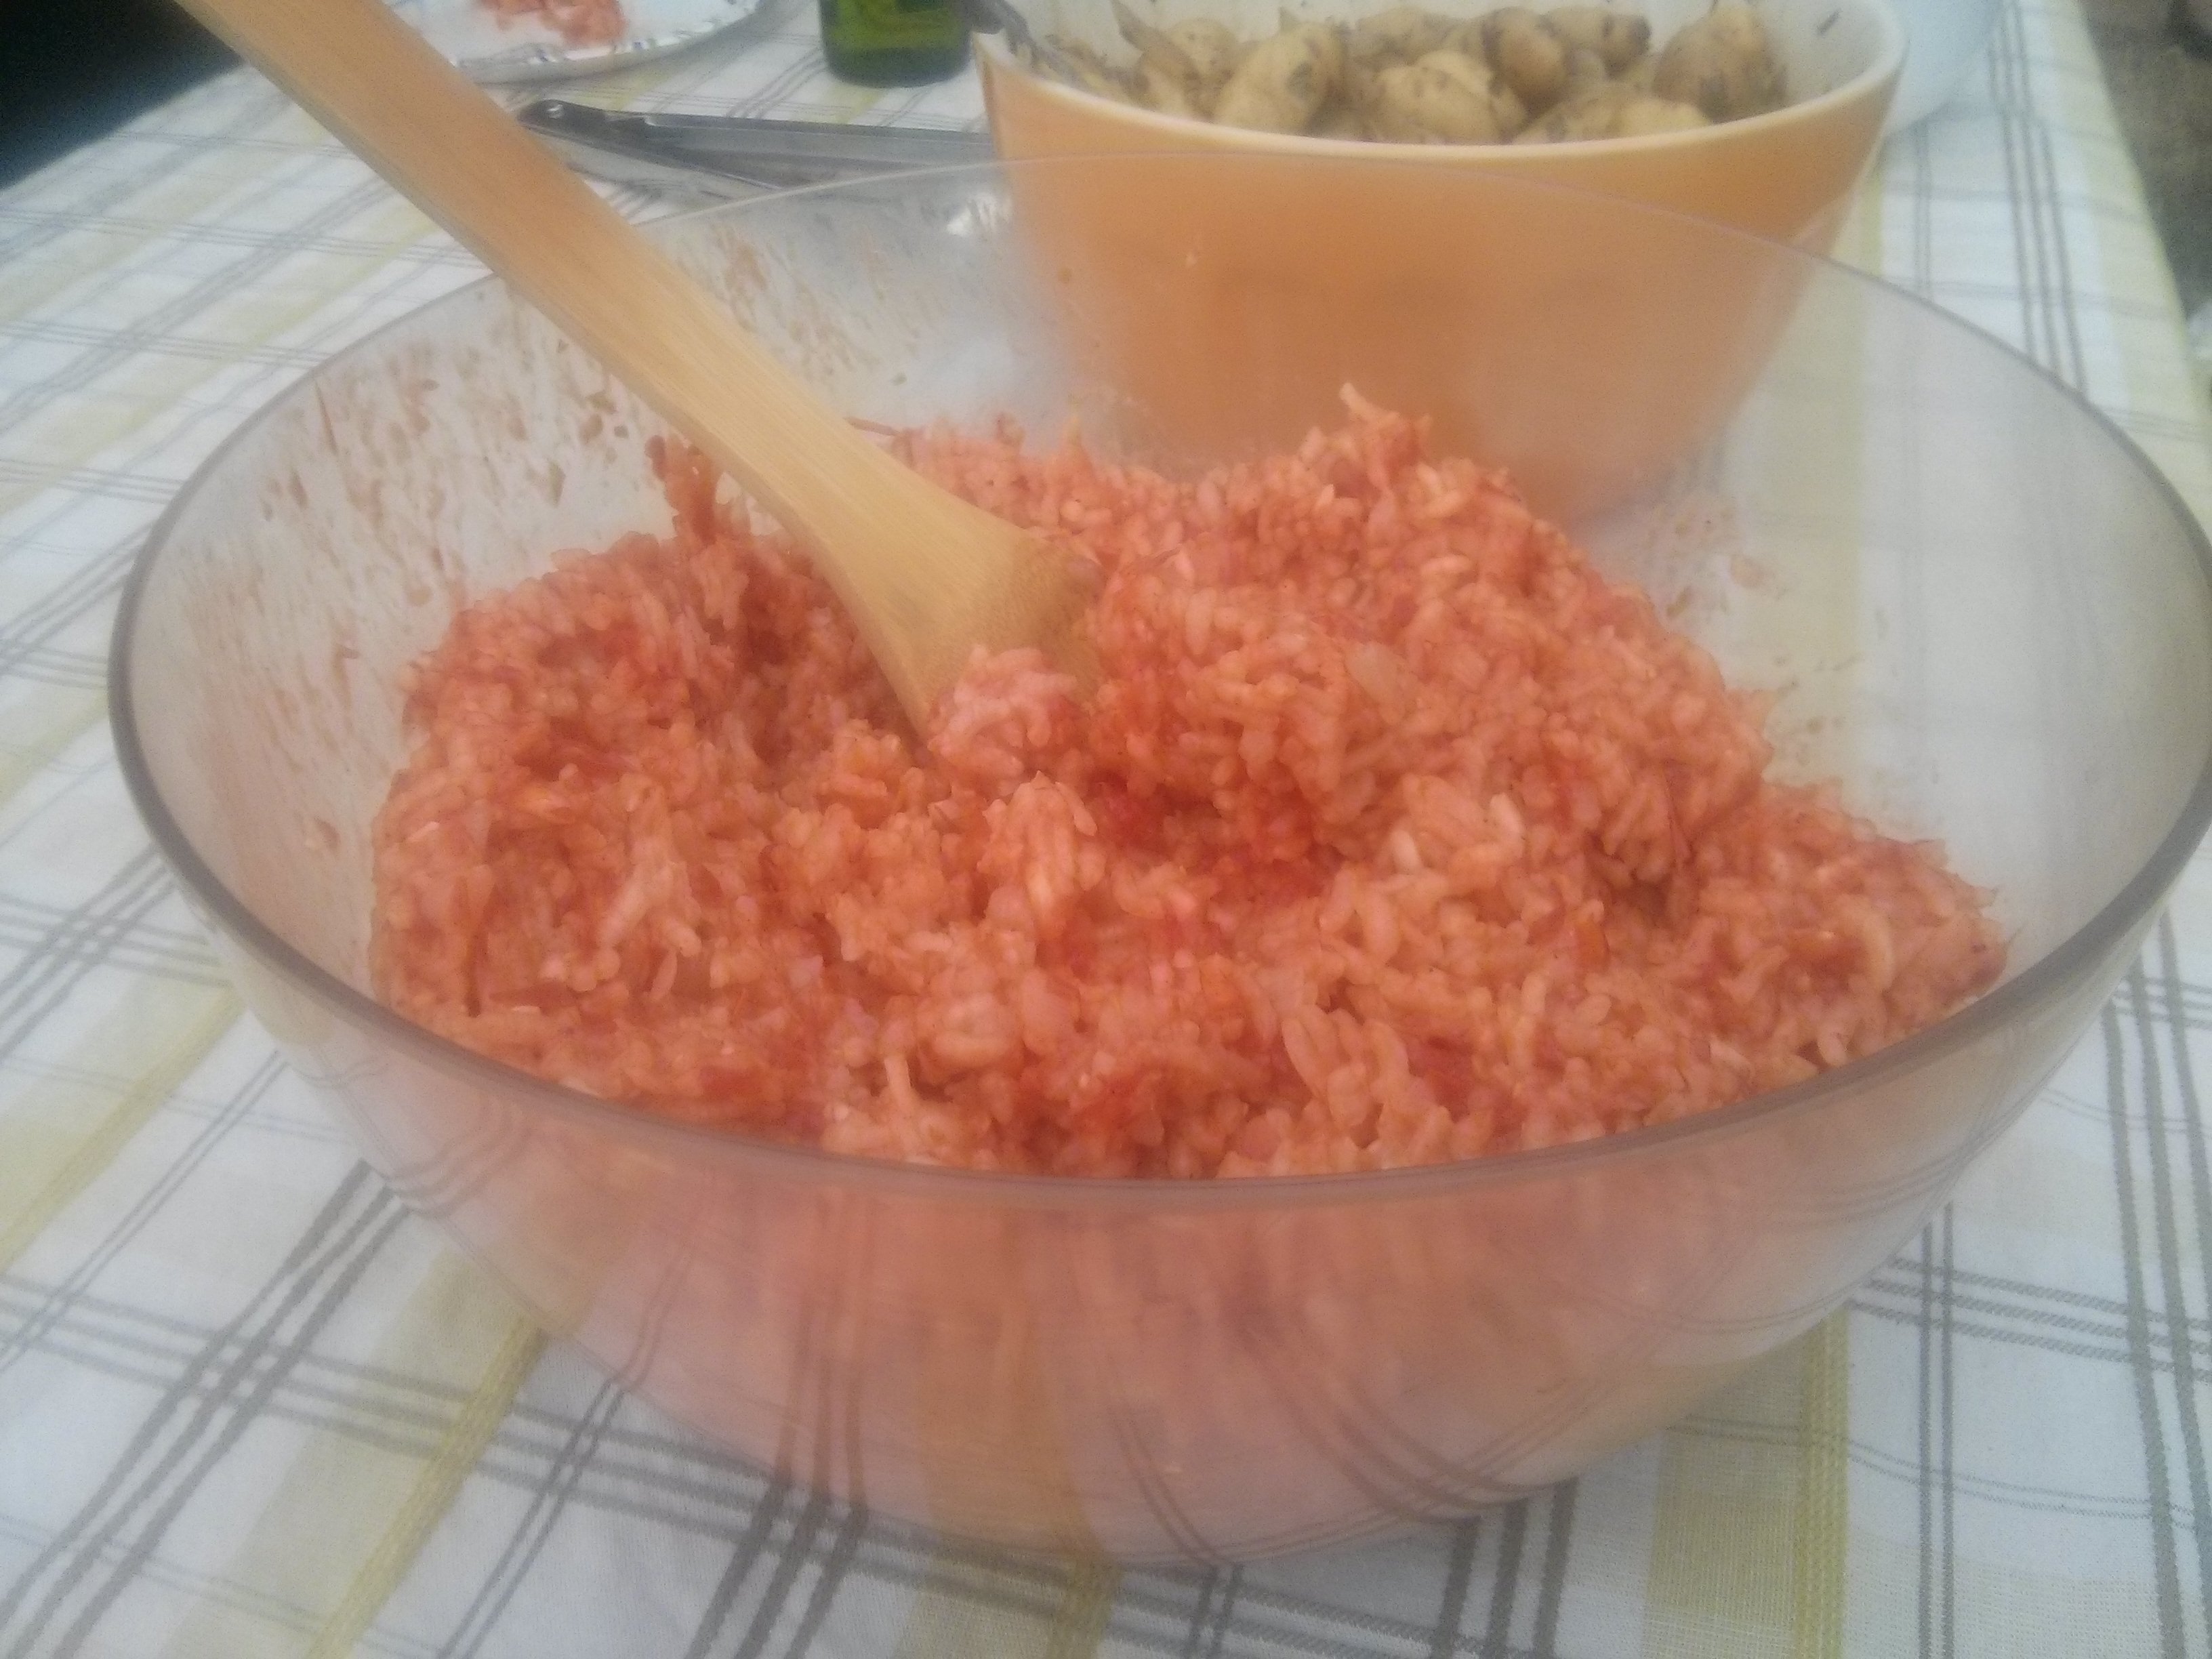
To make the sauce thicker, I also dice the tomato skins into a paste and then add this paste to the pot. I love this step.

wpid-img_20141009_212100.jpg

wpid-img_20141009_213125.jpg

I usually dice the skins by hand, but this time I used the food processor to save a little time. I measured the volume of the resulting paste above, and it was 13 oz.
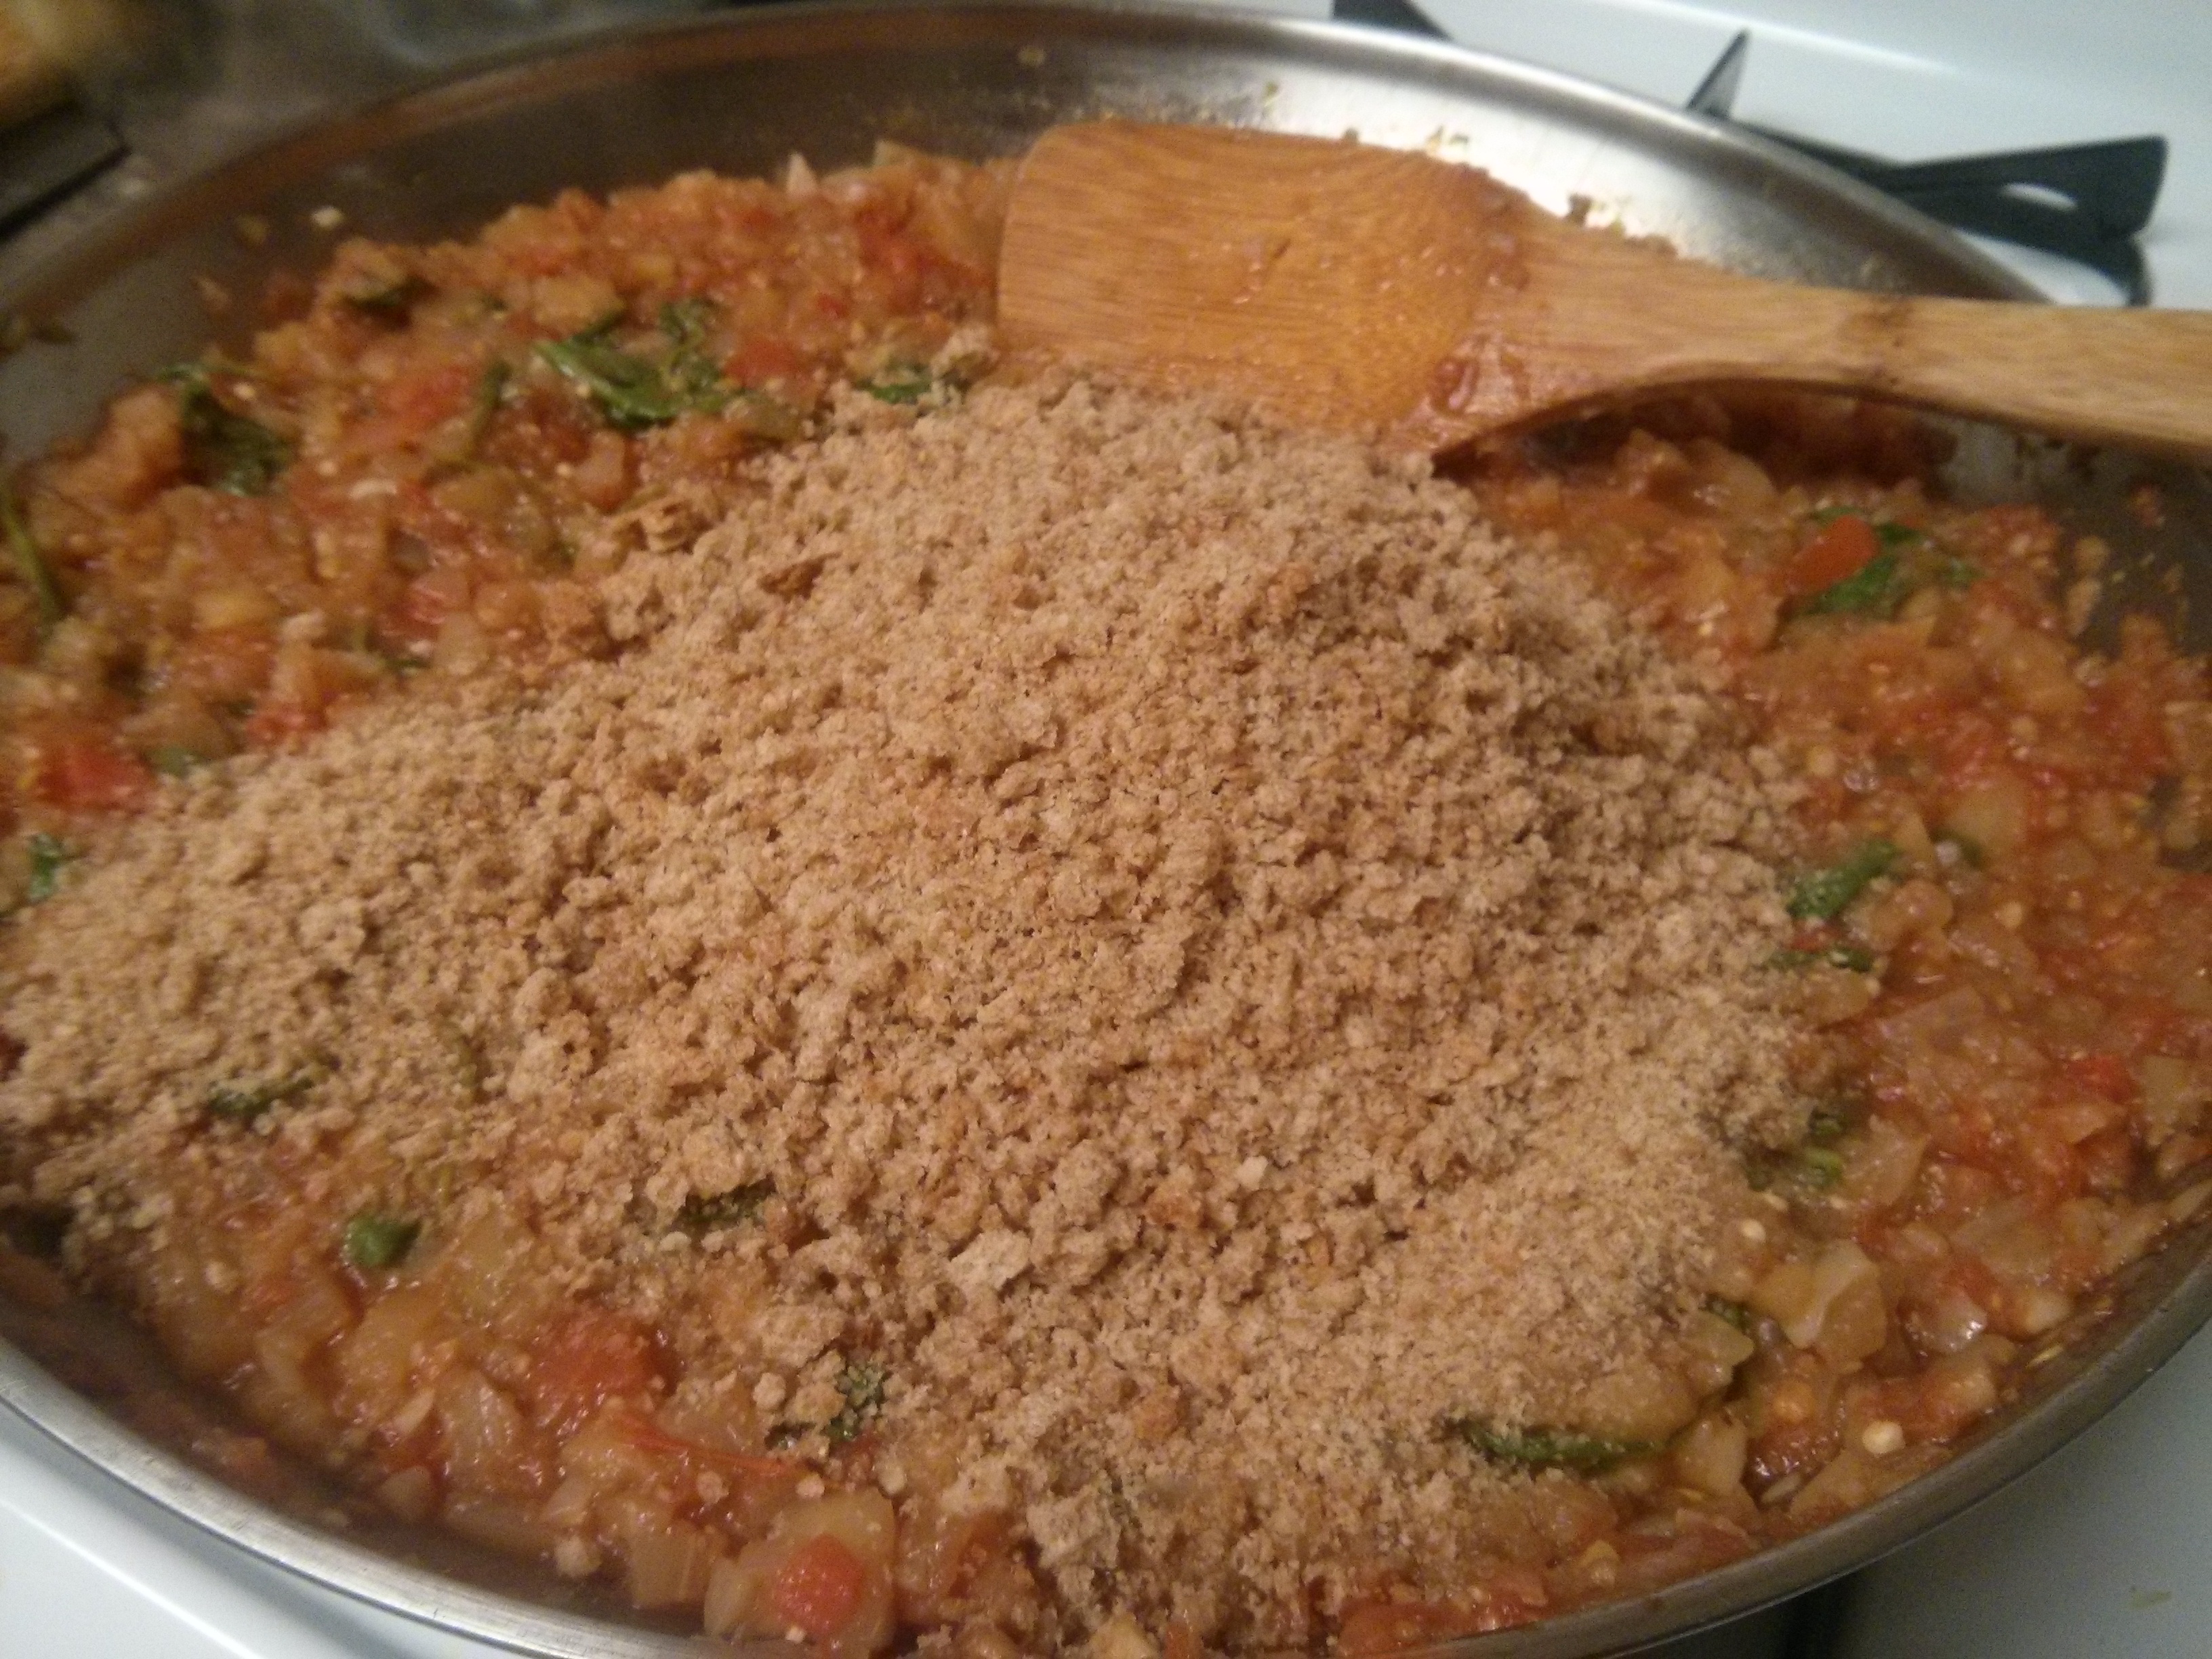
Step 6

The second to last step is adding salt and pepper. I usually do 2 parts salt to 1 part pepper, but the ratio and exact amounts are up to you. Add a little, see how it tastes, add then add some more if you think it needs more.

wpid-img_20141013_231138.jpg

I made a note while I was cooking that I added 1 tbsp salt and 1/2 tbsp pepper, but I think it actually might have been 1.5 tbsp salt and 3/4 tbsp pepper. Either way, it tasted good in the end. I also have a tendency to use less salt than others, so that’s another reason to try things out and see what you like.

Step 7

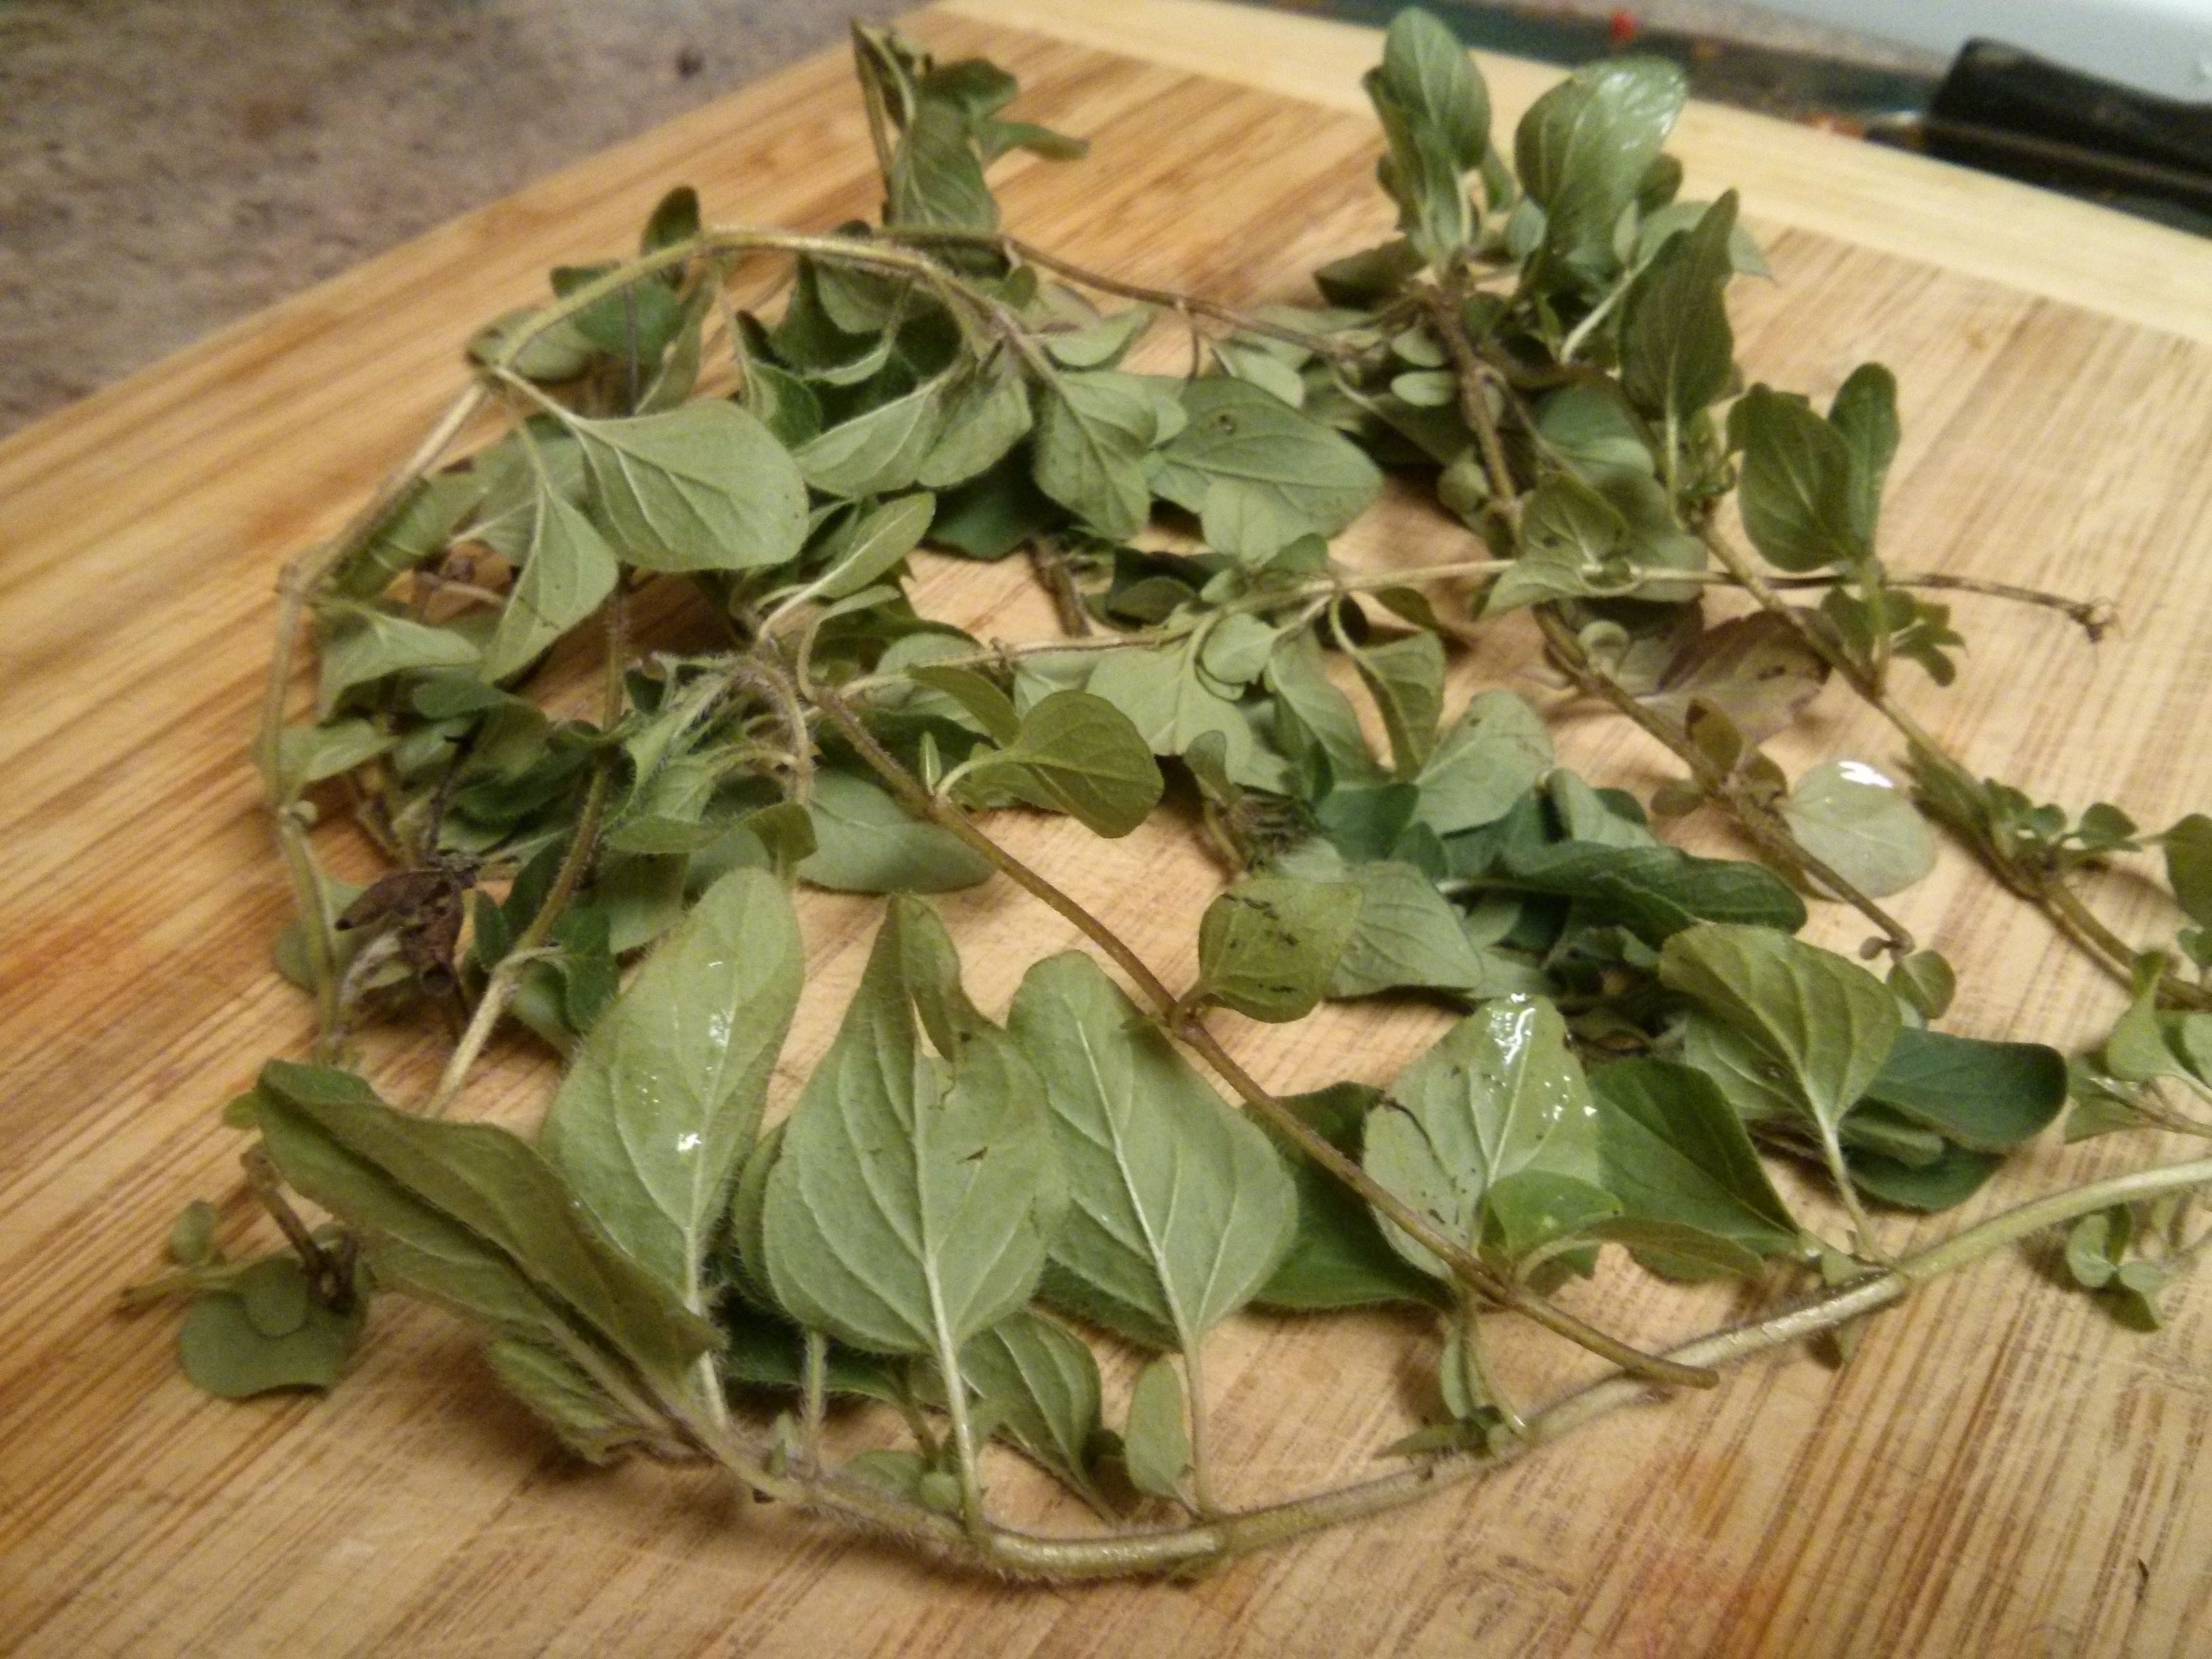
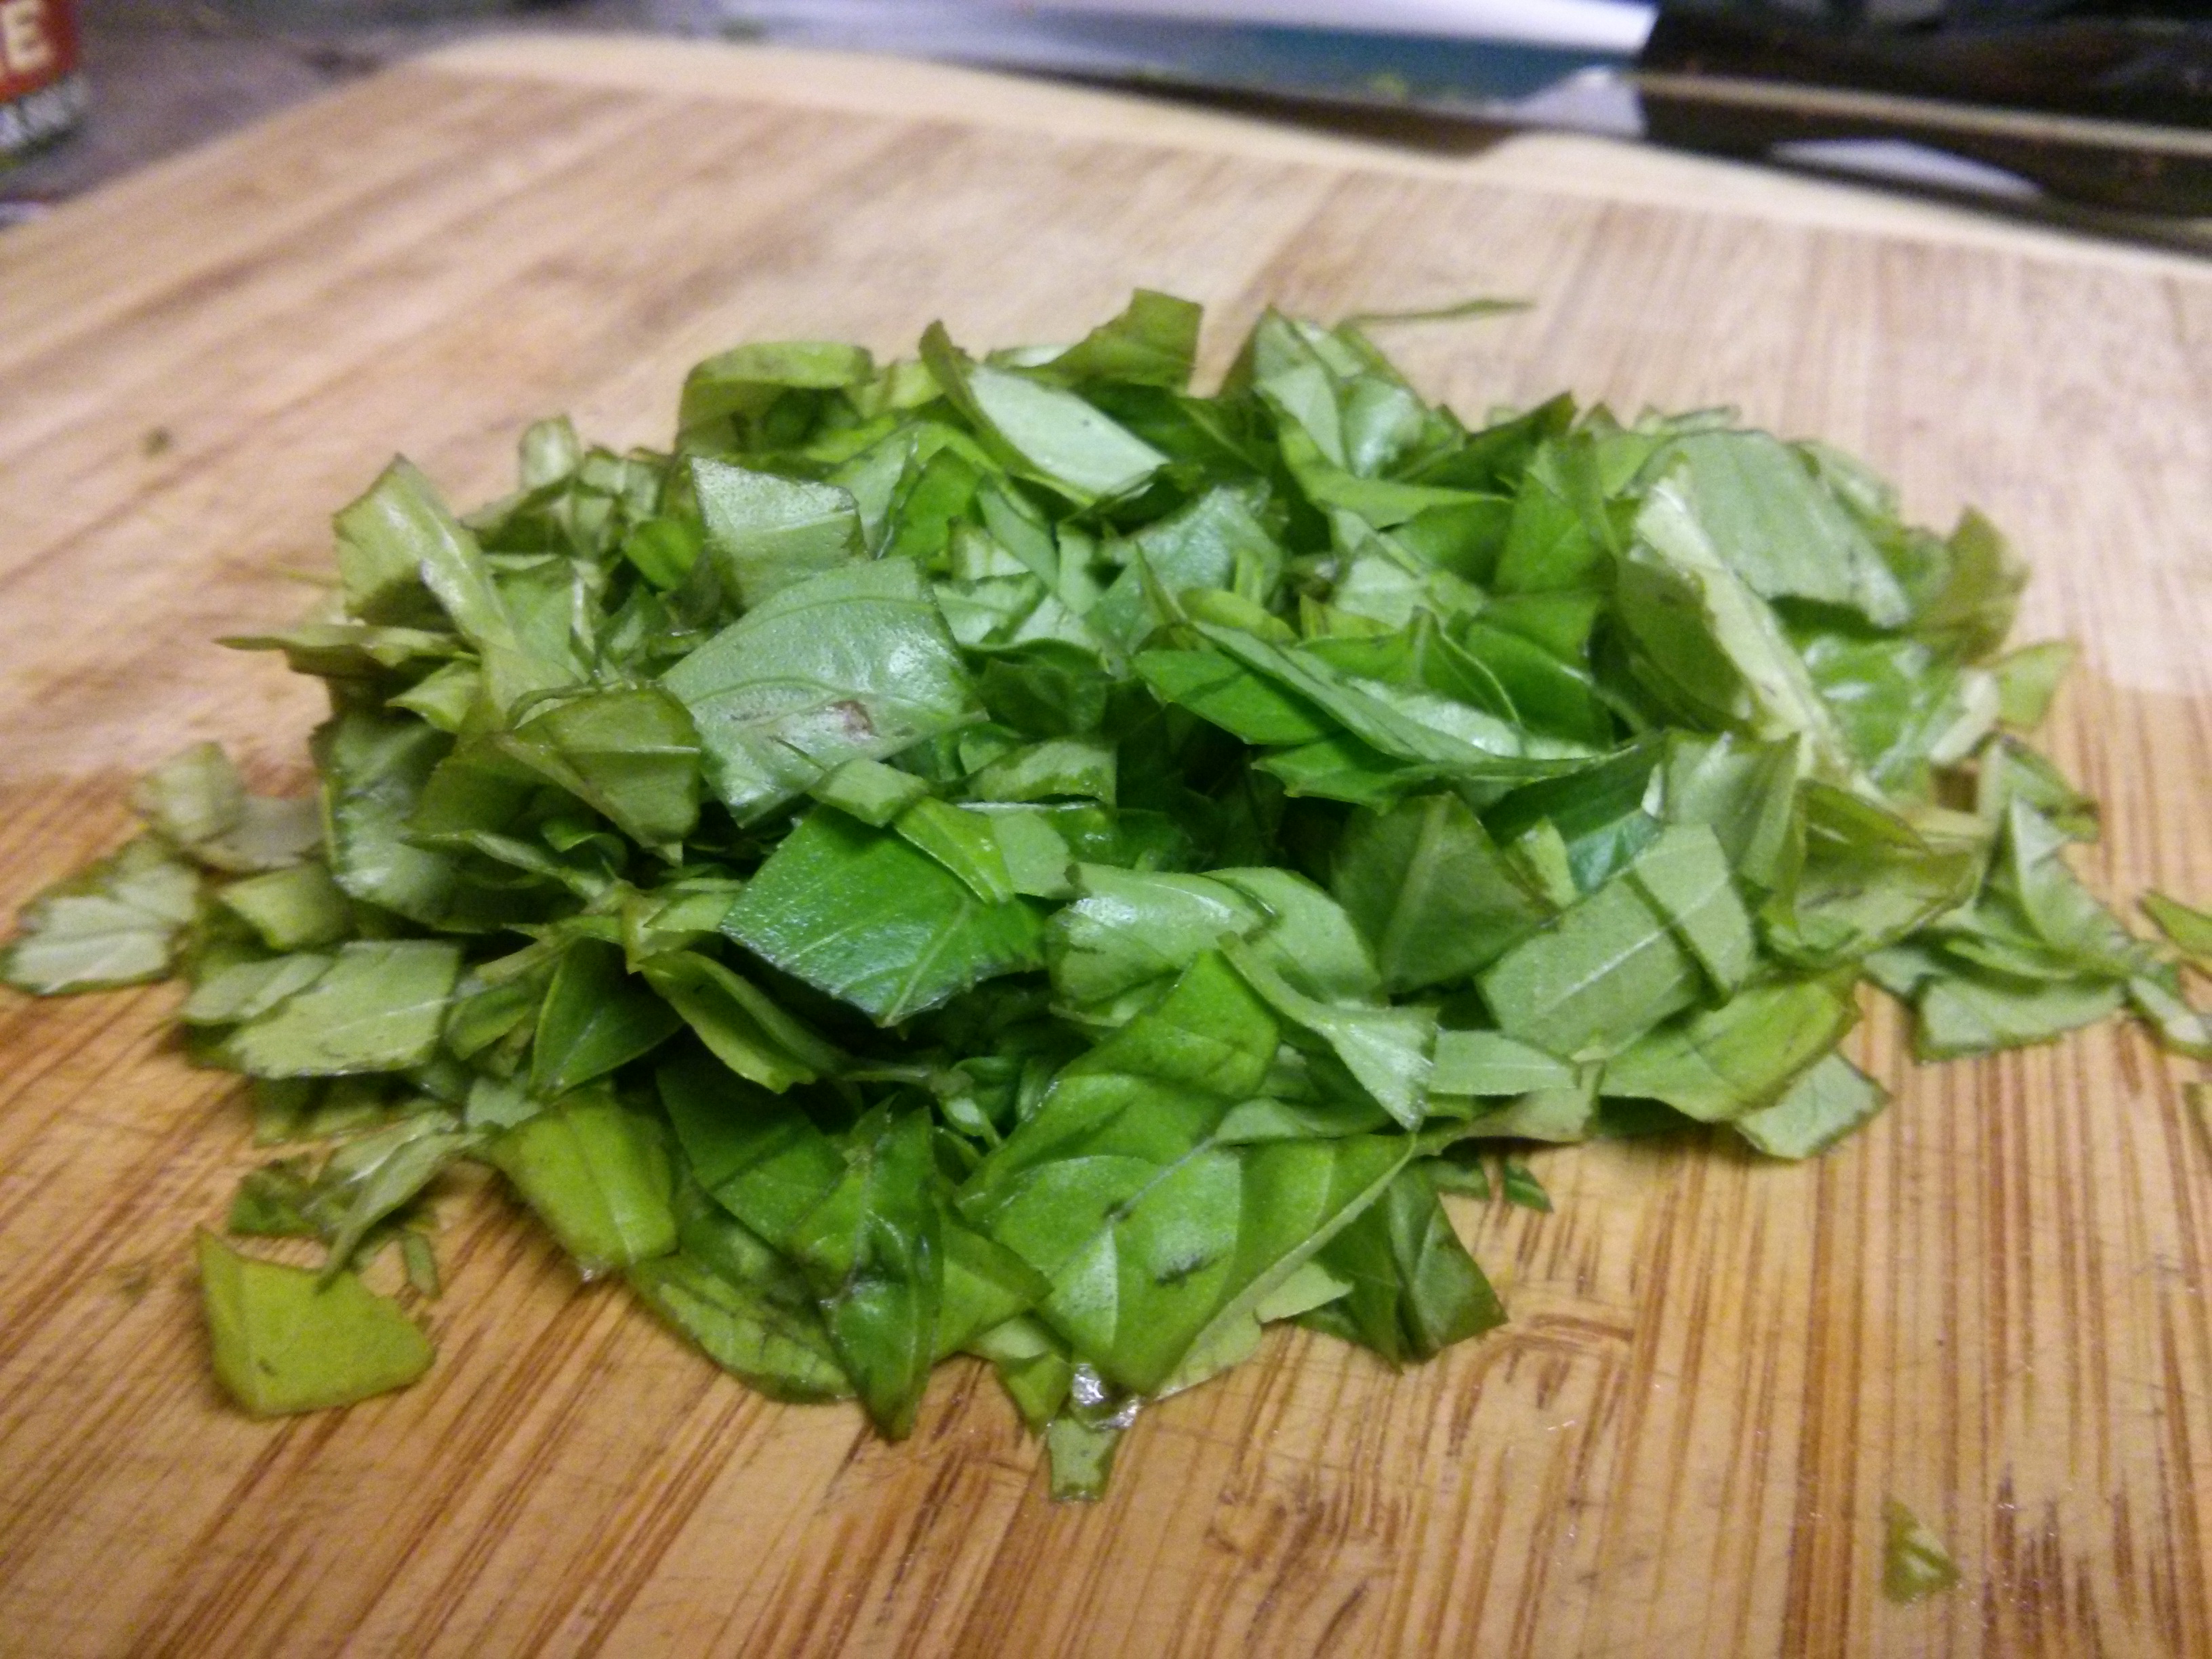
The last step is adding oregano and basil (or any herbs that you like). This time I used fresh oregano from my CSA share and fresh basil from my garden.
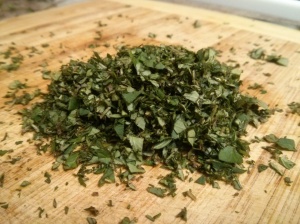
wpid-img_20141009_225556.jpg

wpid-img_20141009_230733.jpg

wpid-img_20141009_231114.jpg

The oregano, diced

wpid-img_20141010_001824.jpg

wpid-img_20141010_002023.jpg

The basil, chopped

I usually add the oregano during the middle of the sauce simmering/cooking time. The basil, though, I add just a few minutes before the sauce is done. I think this helps the basil retain its presence in how the tomato sauce tastes.

wpid-img_20141010_002253.jpg

Looks good, tastes good

A close-up on the looks good

And a close-up view of the looks good

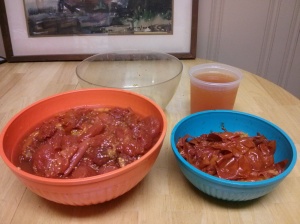
In the end, the approximately 60 tomatoes that I started with helped produce 144 oz of sauce.

IMG_20141011_135702

The tomato sauce

Time-wise, I let the sauce simmer on low heat for about two hours. Cooking the sauce for one hour or even less time also would have worked, but I wanted to make it a little thicker, plus it gave me more time to write 3a. In the end, here was the ingredient list that made it all happen:

  • 60 tomatoes (various sizes)
  • 2 onions
  • 3 cloves of garlic
  • 1/2 cup olive oil
  • 1 tbsp salt
  • 1/2 tbsp pepper
  • Leaves from 15 sprigs of oregano
  • 1 handful of basil leaves

Next up is a look at putting everything together – eggplant, tomato sauce, and cheese: the Eggplant Parmesan.

Eggplant Parmesan, Part 3a

I took a lot of pictures, as usual along the way, but first I’ll do words, with a post called 3a. It started with a line – I got inspired and free – and the rest came as I cooked, plus the plans for 3b.

Part 3: Tomato sauce

There are a lot of ways to make tomato sauce,
But if it’s summer or fall and I have the time,
I like to start off with them fresh,
In place of the canned crushed kind.

From the garden, farm market, and CSA,
I’ll get all that I need and be on my way.

Step one is the stems,
With a knife, cut away.
In a pot of hot water,
Place the tomatoes to stay.

For fifteen or thirty,
Have them sit in the boil,
It’s not the minutes that matter,
But the soft flesh from the toil.

When cooled, peel away,
The cracked skins from the rest,
And reserve for yet later,
To pass the use test.

Meanwhile, start the onions,
And garlic together.
Dice and set in a pan,
And sauté till they’re soft, much better.

And now the tomatoes,
Just before set aside,
Have them join the mirepoix,
For the sauce-making ride.

If they’re soft and cooked well,
The next step is easy,
With a spoon that is wooden,
Split them in pieces.

That cooks for a while,
Let it simmer, not quick.
With tomatoes so fresh,
That’s how to make the sauce thick.

And lest we forget,
About trick number two,
Dice the saved-skins really fine,
And add this paste to the stew.

For salt and for pepper,
What you like, you should do,
Also sounds like advice,
Not just cooking, life too.

Still, to note what I add,
When including this pair,
I trust two parts the former,
One the latter, all square.

The last step’s the herbs,
Oregano and basil,
Dice one and chop two,
And we’re done! Let’s make the plates full.

Are you hungry like me?
I could go for a dish.
We’ll save some for the eggplant,
That’ll be our tomorrow wish.

wpid-img_20141010_002253.jpg

Twine to unwind

Sometimes being a mostly vegetarian comes with extra benefits, such as when it was time this year to help the tomatoes and cucumbers in the garden grow up and climb.

Having been a vegetable parent in the past, I knew they’d do better with a little support and structure. The question was, where to turn for this guidance? The answer? My kitchen cupboard! (And my parents.)

twine wating to be prepuar

Cooking twine, waiting to be repurposed

It’s not all the time that I follow recipes when cooking, but at some point a few years ago, I had the thought, I should cook a whole (little, local) chicken in the oven and tie it up with twine like it says in The Joy of Cooking and other recipes. To make that happen though, I needed to get some twine.

So I went to the local Ace Housewares store.

IMG_20140803_145427

One of the great things about the Ace is that it’s only about a mile from my place. I also love seeing and periodically using the 20% off coupon they consistently print in the local weekly paper, sometimes double-downed with a $25 Ace gift card I’ll get for redeeming $20 of my credit card cash-back bonus. I’m not a big consumer, or much of one at all really, but I like new things like the next person, and particularly so when they’re food-useful and they involve bonus thrift.

When I got to the store, I saw I had two options for the twine – the little ball and the big spindle.

IMG_20140711_185938

Picture taken July 2014, looking just as I had remembered

Now, I was only making one chicken, and my mental math told me the little ball would be plenty, but then there was the unit pricing…can’t ignore that!  200 ft vs. 1,200 ft.  So I could get six times the twine, for only three times the price! Decision made. I walked out of the store feeling good about myself and with 400 yards of twine.

IMG_20140711_190033

200 feet…nice try

IMG_20140711_190040

1,200 feet, and comes with handy pictures…that’s more like it

I’m not sure how much twine it took to tie up that 3-pound chicken, but I can say that when you only do it once, there’s still a little bit left from the original 1,200 feet when you pick it up for the second time two years later. Which is to say, I still had a fair amount to work with when I brought the twine with me to the garden a month ago to work with the plants.

IMG_20140711_202038

The cucumbers, just after stringing, looking ready to climb

IMG_20140711_202029

Also involved: a bamboo pole, a plastic stake, a metal stake, and an unfolded  tomato cage. (Thank you Mom for the complementary, non-twine supplies.)

I treated the two rows of tomatoes to a similar setup, combining the twine with a few stakes and cages to web it up right.

IMG_20140711_202111 (1)

Sauce tomatoes, now happy with the new support

IMG_20140711_202053

A view from the other side too; I added more twine later as the plants continued to grow.

Though the cucumbers have now begun to wilt away with the summer, I was able to get a decent crop. I also picked some tomatoes for the first time last week. As for the twine, it’s now back on the shelf, looking the same as before or maybe just a little trimmer. It did after all get a little workout.

A good start in the garden

I got the call from the Recreation Department in mid-April. I was officially off the wait-list! I’d be rejoining the community garden this year.

It was a good feeling to get the good news – I’d moved in the past year and so couldn’t have a front yard garden as before. I was ready to go! The only problem (but not really, in the big picture) was the Recreation Department’s follow-up detail that the garden wasn’t ready for planting yet. They said it might be ready in a few weeks – maybe by Mother’s Day – after the annual roto-tilling and plot-marking was done. In the end, they bested their Mother’s Day mark by about a week, so come the first week in May, everything was set. We were underway.

The garden area, ready for planting: a 4 x 6 grid of plots, so space for 24. My plot: center bottom here.

The community garden in early May, ready for planting. Overall: a 4 x 6 grid of plots, so space for 24. My plot: center bottom here.

And then so what to plant? To the farmers’ market! The market!…For some plugs to transplant. And to the box! The box! …For the collection of seeds I’d accumulated over time by purchase (most of them), by gift (a few), or by end-of-season collecting (a handful).

IMG_20140618_211027

Curious to know what was inside? So was I!

IMG_3910

The view upon opening

The box certainly contained an assortment of seeds. Here are a few stats and a look at the contents:

  • Total number of seed packets/bags/containers: 109
  • Greatest amount of any one kind:  Sunflowers – 11
  • Second place:  Tomatoes – 8
  • Oldest packet:  Peppermint – 1999
  • Second oldest:  Chinese Cabbage – 2001 (two packets) (also a Hot Pepper packet and a Sweet Pepper packet – 2001)
  • Newest packet: Zucchini – 2014 (from the NOFA-NJ conference – free)
  • Second newest: Sunflowers and Carrots – 2013 (from Johnny’s – purchased)
  • Packets that pack a story: Three flower packets from The Page Seed Company (Marigolds, Snapdragons, Pansies) that have the Hartford Courant imprimatur on the back

IMG_20140618_210305

I got these seeds for free over ten years ago, so now they're not so much Hartford Courant as Hartford Old seeds. Maybe one day there'll also be a Princeton Packet promotion -- and then I could get a pack of Packet seed packets.

I got these seeds for free over ten years ago while working in Connecticut, so now they’re not so much Hartford Courant as Hartford Old seeds. I have a feeling that the Courant germination rate may be similar to an Old germination rate now. I’m going to plant some and see what happens.

Maybe one day there’ll also be a Princeton Packet seed promotion, and then I could say I got a pack of Packet seed packets.

The box also contained some interesting odds and ends, like a ziploc bag full of marigold seeds, a bent spoon container with sunflower seeds, a small folded paper with some chives seeds, and a medicine bottle with Grandpa Ott Morning Glory seeds.

IMG_3920

IMG_3921 
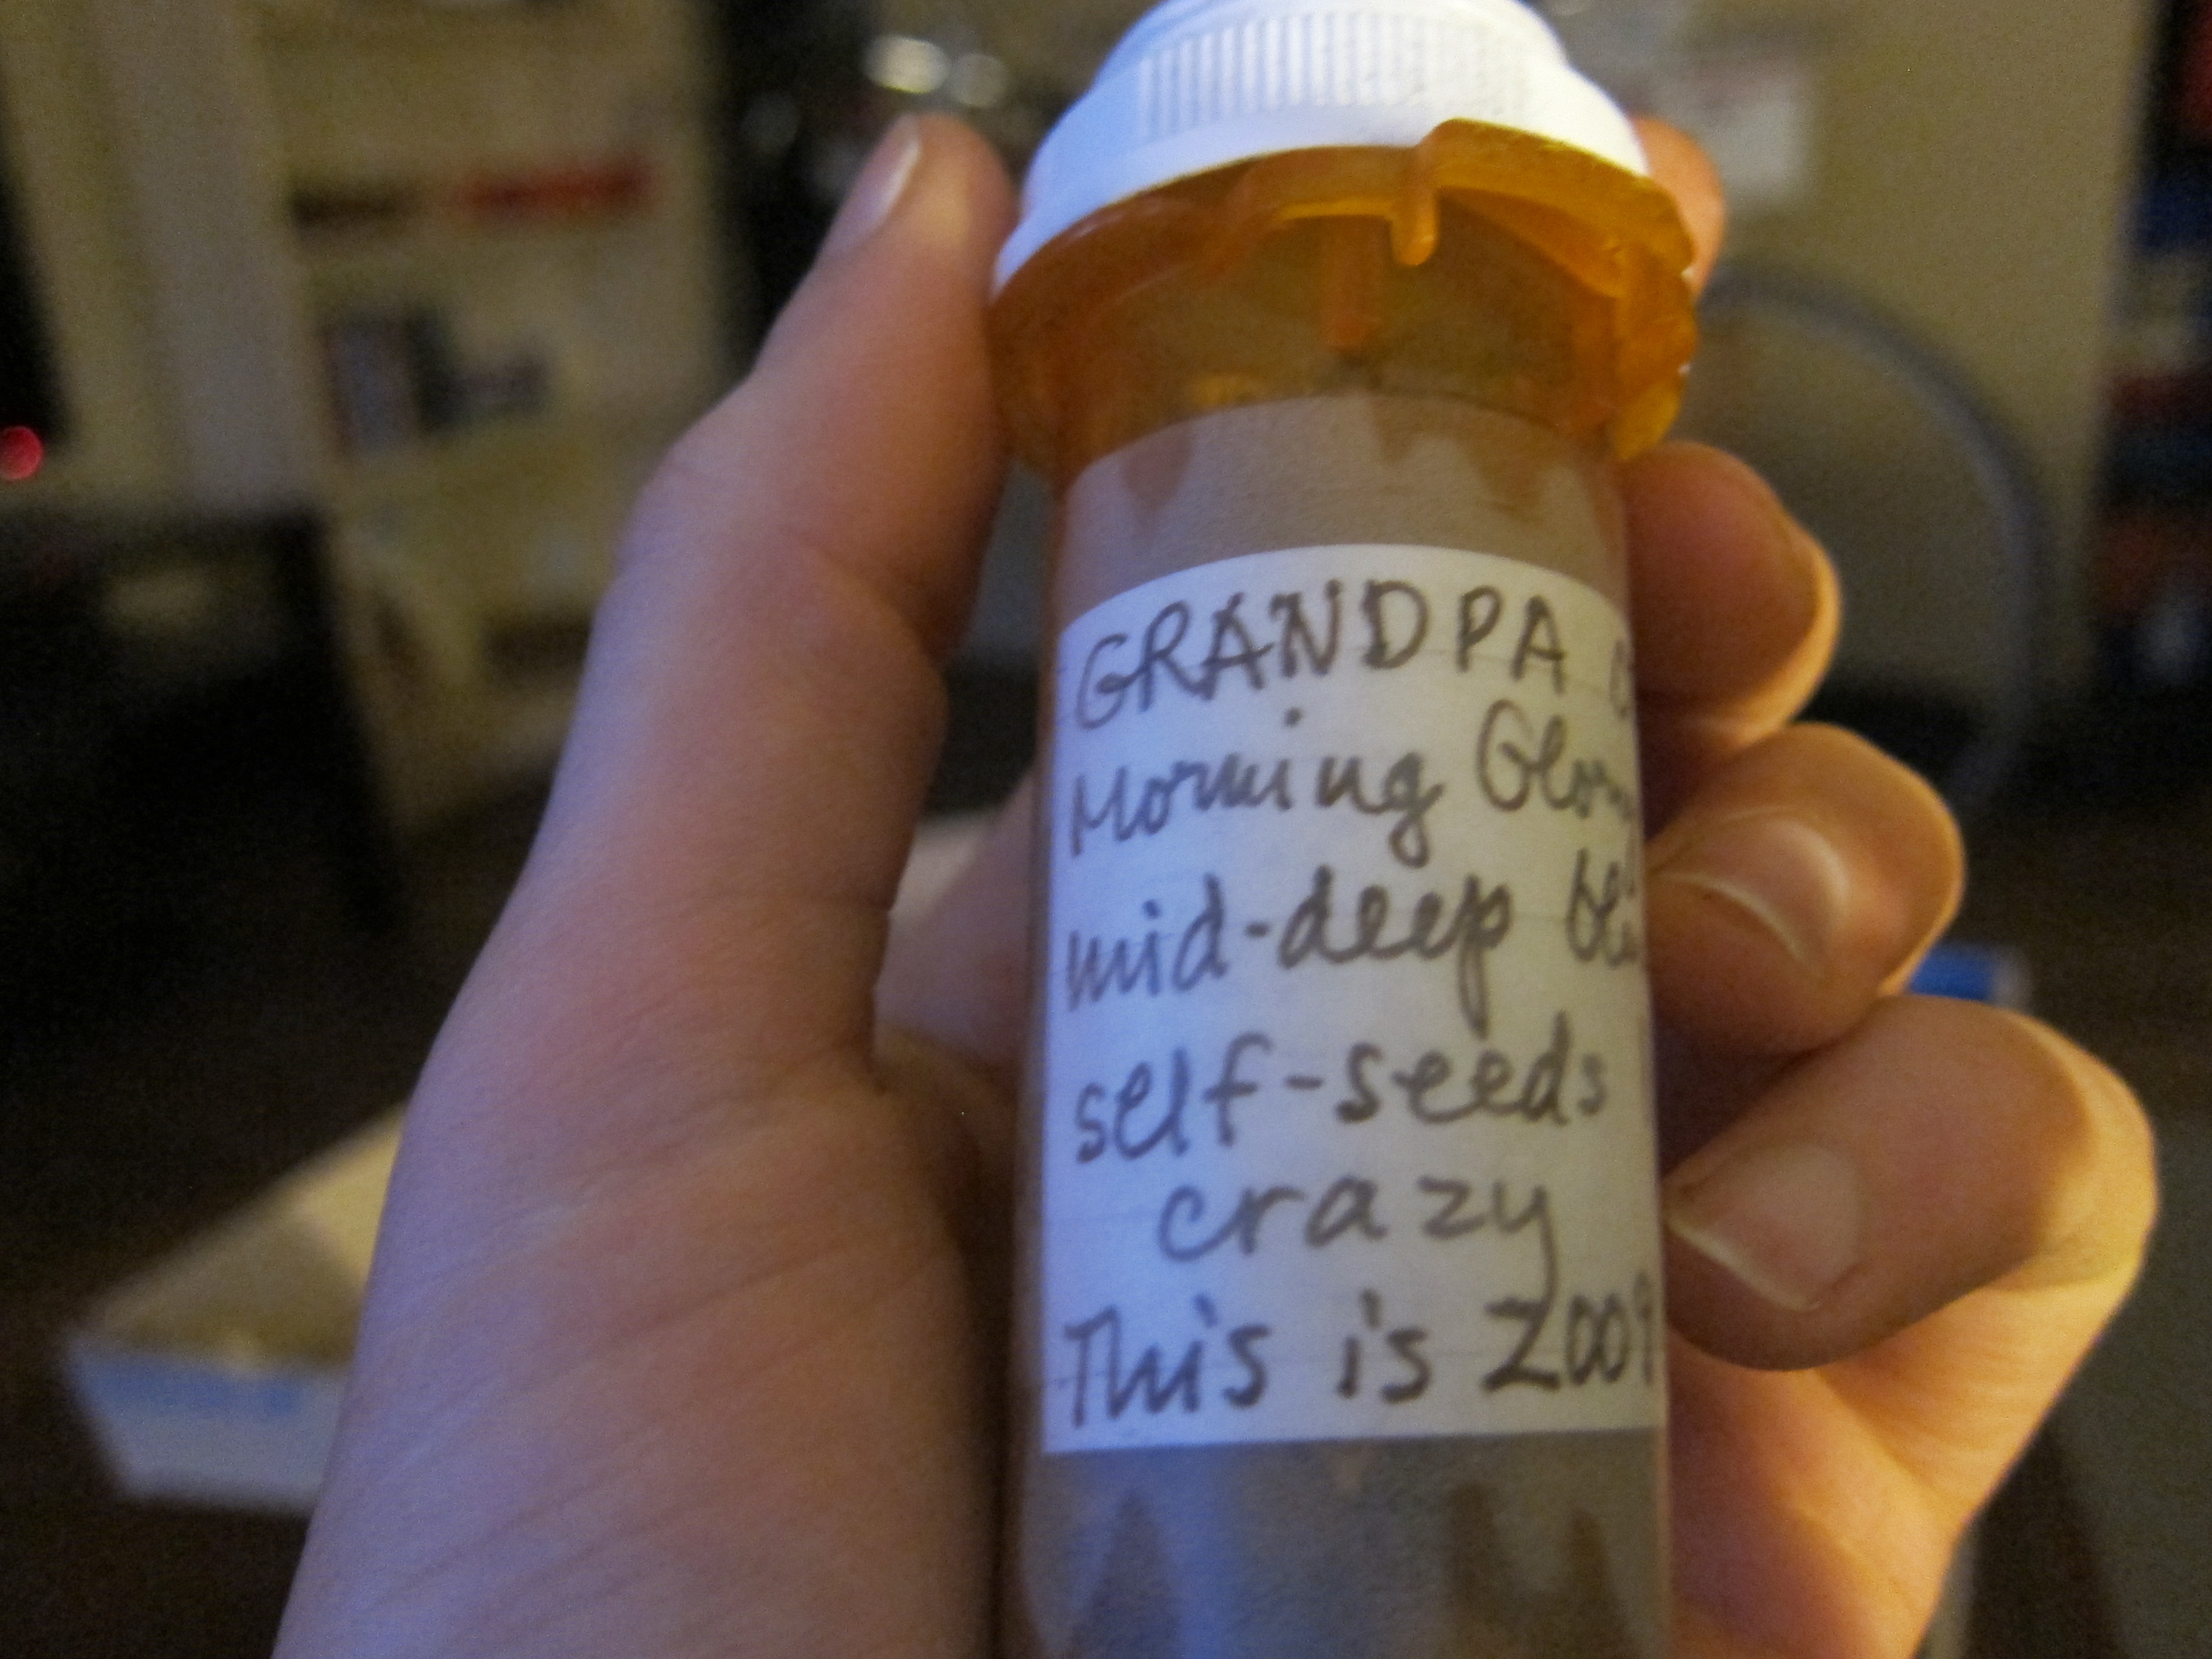
Grandpa Ott in a bottle. I don’t actually have a Grandpa Ott, but my aunt’s handwriting had me thinking for a minute that maybe I did.

I always liked morning glories – as a kid I can remember them climbing the strings on the side of the house all the way up to the attic fan, and I can also remember being inside the attic looking out, seeing the morning glories almost trying to come in – so it was an easy decision to plant some of these. Plus, there’s the awesome medicine bottle storage! I definitely wouldn’t have to worry about little kids eating the seeds and then having morning glories sprout in the their stomachs. (To be honest, morning glories probably wouldn’t sprout in their stomachs, but I heard it might be a different story with watermelon seeds, which kids could consume with a greater frequency).*

IMG_20140618_201517

First I planted some morning glories the garden. This is how they look in mid-June, a few weeks after sprouting.

IMG_20140618_195648

I also planted some in a planter by my house. My next step here will be to talk with my neighbor about some strategic planter placement to see how Grandpa Ott feels about climbing a fire escape.

Of the other interesting odds and ends above, I also tried planting the marigold and sunflower seeds in the garden, but apparently they didn’t share the same vigor as the morning glory seeds and decided not to come up.

No matter though, at least for the sunflowers. I dipped into my multitude of other seed packets and found success there.

little sunflower

A little baby sunflower in mid-June. Now imagine about 30 of these in close proximity, and then imagine all of them all grown up and with lots of beautiful flowers. And then remember to check back here in a few months to see if your imagination matches how this portion (about a quarter) of the garden plot turns out.

As for the rest of the plot, I have about 4/5 of it planted now after a month and a half. I transplanted about 10 tomatoes (mostly of the sauce and paste variety), 4 hot peppers (of the some degree of hot variety), and 6 basil plants (of the traditional Genovese, goes well with tomatoes and other things variety). Thank you by the way local community farmers’ markets and New Jersey farmers for the seedlings. In terms of what came up from the seeds I planted, I also have radishes, cilantro, cucumbers, and zucchini growing in the garden.

tomator

One of the tomatoes, shortly after its mid-May transplant

tmator

The same tomato, now in mid-June

IMG_20140615_143502

Radishes, harvested this week

IMG_20140615_143521

Same bunch

IMG_20140615_145323

Nothing says instant garden gratification like a bunch of radishes

cilantro

Then again, cIlantro’s also a quick pleaser


IMG_20140618_202944

And another look at the garden, mid-June. The sunflowers will likely feature more prominently in future looks, hugging the bottom corner and all along the right side.

Overall, so far so good, and more to come.